• Skip to primary navigation
  • Skip to main content
  • Skip to primary sidebar
Harris Home DIY
  • Home
  • DIY Projects
  • Parenting
  • Lifestyle
  • About Me
    • Contact Me

Why I Walked Away From Teaching- After 6 Years of Loving It

April 20, 2023 by Jeannie

Maybe you stumbled upon this post because you know someone who is leaving the teaching field and want to understand why. Or maybe you’re looking to walk away too and want to know if that decision can be justified after the years and money you spent pursuing this career. Either way, I think you’ll find this blog both clarifying and encouraging. Here’s my 10 reasons for why I walked away from teaching after 6 years of loving it.

A quick look at what’s in this blog…

  1. The backstory
  2. The 10 reasons I’m quitting (in book chapter format)
    • Pressure Pushing Down on Me
    • Manager of the Zoo
    • You’ve Changed
    • Can I Get a Raise?
    • Stress Isn’t a Good Look on You
    • Can You Hear Me Now??
    • In One Ear and Out The Other
    • No Guns Allowed
    • I’ve Got This
    • Made to Make a Difference
  3. A letter of encouragement to those still teaching

1. The Backstory

I was that child. You know, the one who lines up all their dolls and teddy bears, gives them tiny sharpened-down pencils, and uses the family monthly calendar white board to teach them “lessons.” Teaching is in my blood- quite literally. I come from a long family line of educators. Becoming a teacher just made sense.

I realized at a young age that I have a passion for exploring the world around us. It quite literally blows my mind to learn about how the every day things we take for granted work- like breathing. Or how our cells metabolize nutrients to keep us in constant homeostasis. Or how sea turtles use the Earth’s magnetic field to navigate and find their way around the ocean. So cool.

I quickly began to realize that my desire was to imprint that same passion for learning into as many young hearts as I could. Science was the field that fit this passion, so off to college I went!

I landed a sweet job my second year out of college teaching biology to 7th grade students in a large (1,200 students) public school district. I have been there ever since.

Although I’ve truly loved my job as a teacher and am actually quite sad to be saying goodbye, this last year was a reality check. It became very clear early on in the year that this job is not sustainable long-term. There’s so many ways I believe the education system is flawed and ultimately failing students and teachers alike. Those factors are what led me to the decisions to quit. The following are 10 of those reasons, in no particular order.

2. The 10 Reasons I’m Quitting Teaching

Pressure Pushing Down on Me

If you’ve ever been in a group of people before, you know that peer pressure is a real thing. (I want to note though, peer pressure usually gets a bad rap. I believe, and have seen personally in my years of teaching, peer pressure can be a positive thing.) Here’s the problem I see with peer pressure and influencing in the typical classroom setting:

Students are largely influenced by one another.

Think about it. Students spend their educational years with anywhere from 15-30 (on average) students to 1 teacher/educator. The teacher’s voice, the experienced, wise, more mature voice in the classroom, doesn’t have time to help guide the students through tough situations. Decisions like how they can navigate a bad breakup. Or what to do when a friend “backstabs” them. The teacher may have time to offer “little sprinkles” of wisdom, but not enough to always be the guiding force in these students’ lives.

Instead, the students go to each other for the answers. They gather their expertise from students their same age who have lived no more life than themselves.

Why do I see this as a problem? As you can imagine, this presents itself in the form of misbehavior, entitled attitudes from students, messing around during class, etc. To put it simply, immaturity breeds, well, more immaturity. As a result, it makes my job teaching students much harder than it should be.

Manager of the Zoo

If you haven’t explored the world of teaching memes, whether you’re an educator or not, you need these in your life. Trust me on this one. Here’s a meme that perfectly sums up the struggle of classroom management:

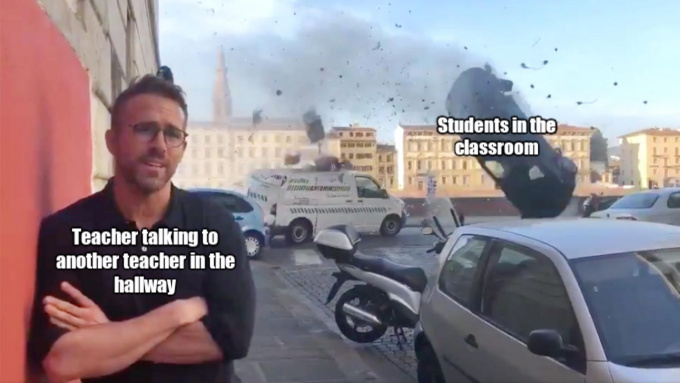
I wish so much that my job description was a picture of what I actually get to do everyday as a teacher. The reality is you spend far more time dealing with problems than actually teaching. It’s a draining experience to leave your job most days feeling like you did everything BUT your job. I think we should start a petition to get school districts to list open positions as “Zoo Manager” instead of “Classroom Teacher.”

You’ve Changed

This reason isn’t super profound, but it’s very impactful on my experience as an educator. Something I’ve noticed, even in the few years in the classroom, is that students are quickly changing. I primarily blame social media and their involvement in the online world for this shift. Students have become progressively more difficult to manage as a result.

One example of this is bullying. Students have always been a little mean toward one another at times, but it’s reached a new level with social media. Students slam one another with vicious comments, posts, and images as they fight virtually and seek revenge.

In other years before social media was as prevalent (and before kids had smart phones in their hands as young as 3rd grade- sometimes even younger) these arguments didn’t escalate to such extremes. Students had the evenings and the weekend to get space from one another, clear their head, and cool down. I’ve talked with many staff in the office who deal more closely with these situations and they agree that this is becoming an increasing problem.

And it doesn’t stop at bullying. Students get inspired by trends and challenges from social media. The trend of disrespectfully calling your teacher by their first name, photoshopping staff with derogatory terms/images and plastering them all over the internet, vandalizing property, participating in school violence… have all happened during my years of teaching at the school I’ve been employed at. Other trends exist that are even more hair raising.

Can I Get a Raise?

I’m just going to cut to the chase and say it- teachers deserve to get paid more. Teaching is hands down one of the toughest jobs out there (if you don’t believe me, I predict you are not a teacher. Go find one, and ask them how hard their job is).

Beyond the endless list of expectations for what a teacher must do, my biggest complaint in this category is that there’s no such thing as overtime.

All the teaching jobs I’ve ever heard of are based on salary pay- not hourly. This means you get a set amount of money whether you work less hours or more hours that week. That sounds great if your job is one you can accomplish in 40 or less hours a week!

I haven’t met a single teacher who can complete the tasks expected of them in that amount of time. Not a single one.

Stress Isn’t a Good Look on You

It was a long day at school. Pointless meetings, endless papers to grade, and students messing around during labs and breaking equipment. I walked through the front door, exhaled all the air out of my lungs somewhat dramatically, and flopped myself onto the couch into a slumped position.

“You ok?” asks my husband.

Slightly surprised, and not realizing my demeanor, I respond with, “Yea! Why??”

“You look stressed.” He says.

“I do??” I am shocked by his accusation. He proceeds to ask me about my day- and I proceed to tell him how horrible it was.

…and typical. It was like every other day at my job.

Realizing this in that moment, I ask my husband if I come home looking stressed often. He replies with, “Yes, and it’s not a good look on you.”

I don’t know who needs to hear this right now, but stress isn’t a good look on anyone. If your job, on a daily basis, is stressing you out? Whether it’s teaching or otherwise- do everything in your power to find a career that brings you life and puts a spark in your step. There will be rough days, but they should never outnumber the good days. Not the other way around.

Can You Hear Me Now??

I’m going to capitalize on the meme strategy again to illustrate this next one:

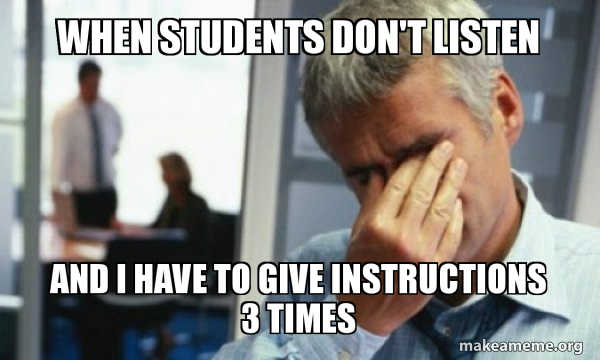
Truly, there’s nothing more infuriating repeating instructions 10 times. It’s like a curse, an embedded flaw within their brains, that students LITERALLY stop listening the moment you say, “Here’s what I’d like you to do next..”

Jokes aside, although this problem doesn’t sound as troubling as some of the others I’ve mentioned, it might be one of the biggest reasons why I’m quitting. If you’re a teacher, I know you feel this struggle. If you’re not, let me try and explain. There is a rage invoked in you when you pour endless hours into creating an engaging and entertaining lesson, only to have students whispering, blatantly ignoring you, and falling asleep in class while you’re teaching.

If I had a dollar for every time I had to stop class until all the students were listening so I can continue on? I could have retired year one.

In One Ear and Out The Other

Ah, the classic summer slide. Where you labor with sweat and blood teaching them all school year, only to have students forget most of it over the summer. And actually, in my opinion, this isn’t the bulk of the issue here. It’s how students learn (what they learn is another issue) that does them a great disservice and results in this kind of learning decline.

School learning primarily functions off of route memorization. For my non-educational audience, this means the typical learning that’s done in the classroom requires students to memorize dates, definitions, details, etc. Why? Because that’s how they test knowledge. They throw a standardized test (usually multiple choice) at students to see if they’ve “learned the content.”

But the problem is studies show that students don’t actually learn this way. A students scores an A on their exam, but they don’t have a clue how to apply that knowledge in real life.

I’ve had this complaint toward the school system since forever ago. I would love to ramble on about what effective and meaningful learning does look like, but I’ll resist the temptation. The bottom line is this: the majority of the learning done in a traditional school system isn’t productive. It doesn’t enrich the lives of students by adding much more than regurgitated information to their brain- it offers few if any tools to improve their problem solving skills and creativity.

No Guns Allowed

This one is an extremely controversial- not to mention painful- subject for many. I will tread lightly here, but what I want to speak about in this chapter is school safety.

I know many jobs have a level of calculated risk involved in them. Teaching was never any different- you could have students throw something at you out of anger, you could get hurt breaking up a fight between students, trip and fall down the stairs carrying the copious amounts of copies you needed for tomorrow’s lesson plan (kidding, but not kidding about this one).. you get the idea.

But hear me out- I didn’t go to college to go into law enforcement. I didn’t desire to become a security guard. At no point during my studies to earn my degree did I envision being concerned about fire arms and safety at my job.

It was a gut punch when I realized that was my new reality at work.

There have been multiple situations this past year where weapons and threats have become an issue- at my building. You think the devastating news of a school shooting is so far from home and it will never be your school… until it is. There were days I feared for the safety of other students at the school. I feared for my own well-being. I found myself envisioning an actual scenario of serious danger and ran through options in my head of how to respond.

Yes, schools have “protocols” for these kind of events, but trust me when I tell you those feel so inadequate when real danger comes knocking at your classroom door.

I’ve Got This

If you were to ask me my very first year of teaching if it was going well, I’d respond with this:

“Yes! Things are pretty good. The things that aren’t going well are because I’m still learning and haven’t mastered some of the details, like classroom management and efficient lesson planning.”

Fast forward 5 years, and I had a profound revelation.

I’ve got this down to a science (no pun intended). I am confident in my teaching strategies and the content is so familiar to me at this point I could regurgitate it in my sleep. So why are there still so many things that aren’t going well?

My revelation was this: the things that aren’t going well aren’t because I’m not an effective teacher… they are because the system of education is trying to function from a model that’s outdated and no longer relevant to society’s needs.

If you’re curious what I mean by that, check out this article. Kerry does a brilliant job at explaining this phenomenon and adding to the conversation of alternative school.

Made to Make a Difference

All the other reasons for leaving teaching stem from the classroom and school itself- this one, however, compels a change from something that’s not a part of school.

My children.

I pursued a career in teaching because I wanted to make a difference in the lives of kids. I wanted them to feel empowered- to know that someone saw their potential and the unique attributes they bring to the table. My goal was to open the door of the world of science and inspire them to think critically, reflect the creativity that’s found in nature, and never stop wondering.

Until one day it hit me. The kids I want to influence the most aren’t the ones sitting in the 30 desks in front of me staring blankly as I try to explain photosynthesis…

They are the ones waiting for me at home.

A Final Thought and Word of Encouragement…

Maybe you’re feeling a little shocked at this glimpse into the world of education from a teacher’s perspective.. Or maybe, if you’re a fellow educator, you’re feeling quite seen and validated at this point. Maybe this is the “sign” you needed to take a leap of faith and walk away. Or, maybe you’re feeling overwhelmed by the reality of your teaching situation but don’t see an end in sight. Here’s what I’ll leave you with;

If you’re not an educator, find a teacher in your life and simply thank them for the hard work they do. Comments of support are free and uplift us more than you’ll ever know.

If you’re a teacher and wanting to leave, do it. It feels so scary to walk away from the only profession you’ve maybe ever known. Let me tell you though how you will feel leaving a job that treats you more like a toxic relationship than a supportive career- free. I instantly felt the weight lift off my shoulders walking out of my principle’s office to inform them of my resignation.

And if you’re a teacher and don’t want to quit, or don’t have the opportunity in your life to do that right now, then know this: you are needed in the classroom and oh so valuable. We still need teachers. And good ones, at that. You are making more of a difference than you realize. Don’t let the constant frustrations dictate how you feel when you leave work every day. Instead, focus your attention on the good things, even if it’s only one thing. Like that sweet student that you’ve connected with who has a difficult home life but feels safe in your classroom. Or the note you got from a former student saying what an impact you made on their life…

Keep those bright rays of sunshine in your back pocket for the cloudy days and don’t ever forget– you may never feel like it, but you are a force of good in the lives of your students.

Blessings to all of you, wherever you may be on this journey. Cheers!

-Jeannie

Filed Under: Lifestyle Tagged With: classroom strategies, education, leaving teaching, school, teacher exodus, teaching, teaching career

The Transforming Power of Adding a Backyard Exit To Your House

April 5, 2023 by Jeannie

*Cringy infomercial voice incoming* Do you live in a house that doesn’t have an exit to the backyard? Do you find yourself daydreaming of installing a human-sized doggy door in the wall so your kids can run out there and play without having to walk all the way around the house or trudge through the garage to get there? Then we have the solution for YOU!!

But in all seriousness.. This was hands-down the biggest game changing DIY project we’ve done to date. If you are like us and have a window in your dining room (if it faces the backyard) but no exit except maybe through a garage and front door, this is absolutely a project you should consider. If you’re curious how difficult this actually was and what details to consider before jumping in, keep reading!!

A quick look at what’s in this blog…

  1. Why we did it
  2. Things to consider if you’re doing this project
  3. How difficult was it?
  4. How we did it
  5. The benefits of having a backyard exit

1. Why We Did This Project

It seems like a no-brainer now but the idea didn’t come to us immediately after purchasing this house. It was a bit of a bummer the only way out to our backyard was either through the front door or garage. After having our first child, I knew we’d want easier access to the backyard for him to play and explore- I just never thought it would actually be a possibility.

Until one day my husband, in his infinite DIY wisdom, looked over at the window in our dining room (that faces the backyard) and said, “What if we just pop out that window and switch it to a door?” My jaw dropped to the ground. How had I never thought of that.. (And this, my friends, is one of the many reasons I’m glad I married this man.)

I couldn’t stop thinking about the convenience and practicality of having a door there instead. We quickly went to work finding out what would need to be done to make this a reality.

2. Things To Consider If You’re Doing This Project

We learned a lot through this process and I know this information will be very helpful if you’re considering this project (which you really should!).

  1. Width of window: You absolutely can make the opening for your door of choice wider than the existing window but that’s going to require contractors. This is because chances are your exterior walls are load bearing and they’ll need proper support when altering them. (Check out my blog on altering load bearing walls for more info.) However, if you are lucky like us and the width of the window is a standard door width (32″, 30″, etc. for swing doors or wider for sliding doors), then this may be a great DIY project for your house.
  2. Electric: There’s a chance you have wires running through your wall below your window. We took the super risky chance of not consulting an electrician before ripping off the inside sheet rock and *huge sigh of relief* we DIDN’T have any wires there. You’ll want to find out if there are wires in your wall too. If there’s not, there’s no need for a specialist. If you do have wires, talk with your electrician about the option to reroute them and the cost involved in that.
  3. HVAC: There’s another structure you want to make sure won’t be in the way when you tear down the wall below the window. If you suspect you have any heating or cooling ducts/equipment in that part of the wall, talk with a specialist about your options and the cost involved. We got super lucky again and didn’t have any HVAC in the way. Our duct comes up through the floor right in front of the door, but is not located in the wall.
  4. Permits: This one is completely dependent upon the area you live. Before you do any demo work on this project, you’ll want to contact your county and ask about the rules and regulations. When I talked with the building permit person in our area and explained what we intended to do, they (amazingly) informed us we didn’t need a permit. I was actually a little shocked by this. For our area, we were told that as long as there was no wiring, no HVAC, we were not making the window opening any wider (which we weren’t), and the height from the floor to the ground outside wasn’t too high, we were in the clear! We didn’t need inspections or permits and could proceed with our project. I’m telling you, we couldn’t have been any luckier with this. I’m hoping you will be too!!

3. How Difficult Was This Project?

Honestly, it looked far more difficult than it ended up being. We went into it with all hands on deck (we had Shawn’s dad, grandpa, and brother-in-law over to help). The hardest part was framing it up on the exterior side afterwards. We had to make sure it was weather proof and we had to be careful not to cut into the siding in areas that it needed to stay intact (we didn’t have extra siding pieces laying around to patch it up if we made a mistake here). This project did require a few special tools, such as a Sawzall to cut away the wall and outside house trim. Your project may be easier or more difficult, it really just depends on the details of your house.

I wouldn’t recommend this project for a brand new DIYer. However, if you have some experience with various DIY projects and tools at this point, and feel confident about tackling this, it’s TOTALLY worth it in my opinion. The benefit of having a backyard exit to your house is indescribable!

4. How We Did This Project

Once we considered all the details I mention in section 1 and created a game-plan, we started the demo process.

Starting the demolition process!

After stripping the trim off the window, we busted through the sheet rock (my personal favorite part) and removed the insulation.

Then we dismantled the window and removed the screen and frame.

Removing the window frame and all the insulation strips that were stuffed in the cracks

Time for cutting and pushing out the wall below the window!

Now THAT’S a hole!!

I won’t dive too deep into the details of our process because there’s a thousand and one ways to demo a hole in your house. Your journey to get there will be unique to the tools you have on hand and the details of your house. I will emphasize though, however makes sense for you to achieve the demo, make sure you don’t cut into the studs on the left and right side of the window opening. It’s key to keep the opening the same size if you are doing this as a true DIY project and not involving contractors.

Now to install the door, per brand specifications, and try it out!!

Grandpa trying out the door for the first time

The little guy came to investigate and seems to like it too!

Already dreaming about how he can escape…

All that was left at this point was to frame it out- both on the interior and exterior. We used wood 1x3s to frame the inside and some PVC door trim to match the color of our house on the exterior. After some painting and caulking, the project was done!

Don’t mind the season change… I realized I had never snapped a photo of the final project back in the summer!

We LOVE the amount of sunlight we get through the double sliding doors

And there you have it! Our journey swapping out a window for a door.

P.S. This is our dining room (in a small 1,000 square foot house)- if you’re curious how we have a big open area instead of a centered table and chairs, take a peek at our Breakfast Nook Blog to see how we achieved this!

5. The Benefits of Having a Backyard Exit in Your House

I meant it when I said this was a game changer. When we are blessed with nice weather, there’s not a single day this door doesn’t get used. Here’s a quick list I compiled of benefits to having a backyard exit.

  1. Having a quick entrance/exit point for your kids to come and go from outside play
  2. A door, if you install a sliding glass or French style door, lets in much more light than a window
  3. If you host gatherings with friends or family, it allows for easy access in and out of the house to get food and socialize both indoors or outdoors
  4. It simplifies doing laundry if you are someone who likes to line-dry your clothes
  5. It makes the room the door is located in feel much larger
  6. I looked it up and although it doesn’t seem that adding a door adds money value to your house, it undoubtedly adds resale attraction value
  7. This is a great way to upgrade your backyard as well. You can add pavers in front of the door and decorate it with outdoor chairs and a table, add a firepit, a neat DIY pergola, a path of stepping stones from the door entrance to your garden… the options are endless!

In Conclusion…

I hope this blog, whether you were searching for this specific topic or stumbled across it on accident, opens the door on the possibilities of what you can do with your home to make it more functional and aesthetic (no pun intended. …ok actually, pun very much intended). I know I usually end these blogs with “If we can do it, you can too!” but since I said this wasn’t a beginner friendly project, I’ll leave you with this:

If you have the confidence, or are even 50% sure you can tackle this… you will not regret it! And remember, any problem you encounter is usually just a quick Google-search-solution away. Happy DIYing!

-Jeannie and Shawn

Filed Under: DIY Projects Tagged With: DIY, Home Improvement, Window DIY, Window House Project

5 Unique Tips for Creating the Perfect Board and Batten Wall

April 2, 2023 by Jeannie

I want to say this right off the bat- this is not a “how to” for creating a board and batten wall. There are TONS of amazing bloggers and DIYers out there that have nailed this and can help you if you’re not sure how to build one. Instead, this is a blog about 5 unique tips that you totally need to consider when building your board and batten wall. They very well could be the creative inspiration you need to take this DIY project to the next level!

A quick look at what’s in this blog:

  1. What is a board and batten wall
  2. Tip One: Height
  3. Tip Two: Add a ledge
  4. Tip Three: Corner it!
  5. Tip Four: Board spacing
  6. Tip Five: An alternative to MDF
  7. BONUS TIP

1. What is a Board and Batten Wall, Anyways?

Turns out, board and batten walls have been around for a while. A quick google search informed me that they are thought to have originated in Sweden and Norway, and became popular in North America in the 19th century. Apparently, it used to be called “barn siding” because, well, it was used for barns as siding!

Board and batten has definitely made a big name for itself in modern home design. The structure consists of vertical boards spaced out even distances, with horizontal boards running the entire length both on top and bottom.

There are tons of variations in the design of this, but the typical board and batten starts at the floor and reaches about half way up the wall. Furthermore, it can cover a single wall, all the walls in a given room, or even be found continuously throughout an entire house.

We chose one large, empty wall in our living room to cover with board and batten. It gives it this “featured” feel and brings the entire room to life. It’s hands down one of my all-time favorite DIY projects. Read ahead to find out what tips we have to perfect your own board and batten wall project!

2. Tip One: Consider The Height

This is one tip that I don’t hear discussed often when it comes to building board and batten walls. The height. It sounds so simple, yet it’s one of the most important decisions you’ll make in this project. Because there’s no “standard” or “required” height for a board and batten, you’ll want to determine what makes the most sense given the wall space you are covering.

I’ve seen board and batten that sit very low to the ground, such as in bathrooms. This can be really appealing in certain rooms (for example, how the board and batten runs along the wall behind a toilet which sits low to the ground). The common height seems to be chest height- however, I want you to consider going to a picture wall height. This means the vertical boards extend up to approximately the height you would hang a picture on the wall.

Especially if you are covering a single wall in your dining room, living room, or bedroom, it looks stunning to bring your board and batten up to this “picture height” eye level. This gives it a “featured wall” feel and actually makes the room feel much bigger.

In a dining room, for example, you could decorate that feature wall with a centered buffet table. If you have a chest height board and batten, you aren’t going to see much of it behind your buffet table. The same goes for a living room- if you have the boards run higher, you can place a sofa or cute matching chairs and a coffee table in front of it without impeding on the visual effect of the board and batten.

In a bedroom, running the boards up higher can create a really beautiful “headboard” look behind your bed.

3. Tip Two: Add a Ledge

This tip works especially well if you go with the picture wall height as mentioned in the last section. You can easily add a ledge (to your preferred depth) to your board and batten. The possibilities here are endless but the idea is to decorate the ledge with a cute vase, a few family photos, or your favorite Hobby Lobby decor.

Every few months we redecorate our board and batten, typically keeping up with the seasons. This may be too much decor for your preference, but how fun is our Christmas board and batten set up??

Our cozy Christmas look! This is in leu of a proper fireplace mantle.. maybe some day we’ll have one of those

4. Tip Three: Corner It!

I owe all the credit of this idea to my incredible husband, whose creative talents are sometimes overshadowed by my Pinterest finds. Our original plan was to simply cover the one large wall in our living room and nothing more. Instead, we ended up wrapping the board and batten around the very small corner we have that cuts off at the bathroom door. This gives the board and batten more “movement” and looks quite honestly, perfect. It ties the hallway into the living room and feels seamless.

We added just one board “space” to wrap around the corner. It turned out perfectly!

5. Tip Four: Board Spacing

The spacing of your board and batten is key to a neat, visually appealing end product. Some places may tell you to space it out x,y,z distance between each vertical board. This is my advice, if you haven’t been told this already: your spacing should be unique to the space in your house you are covering. Once you’ve decided on the wall, measure the complete distance you want to run your board and batten. Then, divide it into even sections and mark off the sections. In addition to your starting and ending board, the ones in between will sit centered at each of those marks.

I’ve seen board and battens where there is an uneven space at the last two boards. It doesn’t look well planned out or nearly as attractive as its evenly spaced counterpart.

Number of Boards

This is a “sub” suggestion to the even spacing… but don’t forget to consider how many vertical boards to use in your project. We figured out what looks best in our space by doing a “trial” with the boards.

After installing the top and bottom board, we cut multiple boards to the correct height. We then tested out how many would look best by evenly spacing out a different number of boards, stepping back, and contemplating (we just set them up to the wall- we did not fasten them to the wall on this step).

Trying out 5 boards across
6 boards ended up being the winner!

6. Tip Five: An Alternative to MDF

Call me crunchy, a health-nut, over-dramatic, eco-minded… I HATE MDF board. It’s not very sturdy, it smells bad (in my personal opinion), it doesn’t work in areas where there is exposure to any moisture, and it’s full of VOCs from the urea-formaldehyde adhesives they use in manufacturing. My husband and I avoid MDF like the plague. So what does MDF have to do with board and batten walls?

If this is one of your first ventures out on the infinite internet exploring the idea of building a board and batten wall, you may not have discovered this essential part of the building process yet. Unless you are one of the lucky few people on the planet that have smooth walls, something needs to be done with the texture on your wall before installing board and batten. You will not get the flawless look of this project if you skip this step. In fact, I’ve not even heard of someone installing it without first dealing with the texture of the walls.

The typical way to smooth out the space where your boards run along your wall is to cover the area with MDF board. It’s true- MDF is smooth and paintable, so not a bad option.. if you’re not worried about the characteristics of it like I am. So in my stubbornness, I told my husband we are not using MDF and we are going to have to find another way to de-texture the wall.

Mega disclaimer right here… this is not as easy as MDF, nor is it void of a gigantic mess. BUT… would I go back and not do it this way? No. This would still be my game plan. We used joint compound and quite literally, mudded the wall smooth.

After deciding the height of the board and batten, my husband applied mud with a large puddy knife. He would spread it out, wait for it to dry, lightly sand any ridges, and apply some more. He did this until we got the smoothness we desired.

7. BONUS TIP!!

Listen… you can judge me for being the biggest cheapskate in the world, but this tip is about to blow your caulking game out of the water. I’ve seen links to these tools floating around. It’s meant to be smeared over your bead of caulk to get the perfect, smoothest seal between your boards.

Don’t have this tool on hand or don’t want to spend the money to have yet another niche tool laying around just to get lost in your garage later? Use the corner of a credit card. Boom. You’re welcome. (And if you wipe it off right away, you can keep it clean and use it again for the next project. Just don’t let it dry if it’s a card you’re still using at the moment… just trust me on that one😉.)

Conclusion

I hope this list has been a help and inspiration in your quest to transform your space with a beautiful board and batten wall. Once you’ve made a plan for your design, don’t be afraid to jump in and give this project a try!

And don’t forget… if we can do it, you certainly can too!

-Jeannie and Shawn

Filed Under: Uncategorized Tagged With: Board and Batten, Board Spacing, DIY, Home Improvement, MDF, Picture Wall, Wall Ledge

Strategies for Enduring a Long Unmedicated Labor

March 30, 2023 by Jeannie

After two unmedicated labors, one induced with Cervidil at the hospital and one completely drug-free at home, I have learned key strategies to help endure the intensity of it all. Contractions are no joke. But your body’s ability to birth is innate and was blueprinted generations ago.. and you are absolutely capable of having this baby without pain meds. My hope is this information will propel you forward with courage as you journey through labor and meet your bundle of joy!

A quick look at what’s in this blog:

  1. How It All Started
  2. Educate Your Person
  3. Embrace the Waves
  4. Think HUGE
  5. It’s all in your Jaw
  6. Mindset is EVERYTHING

1. How It All Started

Our first birth…

I remember my first labor like it was yesterday. I was so naive and unprepared- casually strolling through my pregnancy in blissful ignorance, thinking I would “figure it out as it happened.”

Bad idea.

Although I had a set plan to not get an epidural or Pitocin, I hadn’t thought through much else. Breathing techniques? My body will just know what to do, right? Other drugs the hospital may throw at me? They wouldn’t do that… What if I end up with a C-Section? There’s no way that will happen!

WELL, let me tell you… that plan backfired epically. I ended up induced with Cervidil (a drug with sometimes similar effects to Pitocin), labored for 14 hours in excruciating pain, and made it to 10cm only to have me and my baby wheeled back to the OR in a flurry of just moments to cut me open and deliver my son via a crash c-section (this is where mom is put under general anesthesia).

Whoa. What just happened??

I could go on and on about why I believe I ended up in this situation. Was it the cascade of interventions I received? Was it my lack of preparation to know how to properly advocate for myself in the hospital? It was probably a mix of those things… but ultimately, it was going through the most excruciating sensations of my life that inspired me to figure out how to do it better the second time around.

Now welcoming to center stage: contractions.

If you’ve never been in labor before, it’s hard to say what your experience will be like. Some women describe contractions as pain, other women say it’s like a wave of sensations. For me personally, they feel like very intense period cramps. They start down by my lower belly. As the intensity swells, the sensation reverberates out to my extremities. It hits a “peak” of sensation where it’s strongest, and then it quickly fades away. The procession of contractions during labor are typically the longest and hardest part.

In my hospital birth, I found myself feeling completely out of control as each next and stronger contraction hit. I would brace myself as I felt one coming on. I squeezed the sides of the bed will all my strength in an attempt to withstand the pain. The sensations were more than overwhelming.

Our Second Birth…

This time around I knew I needed to actually prepare myself for the labor I had pending in my future. I read books on the topic of birth, listened to ample amounts of podcasts, saw a pelvic floor specialist, started following birth accounts on Instagram that I resonated with, and researched like crazy. I found myself both enamored and amazed as I learned about the details of what happens in our bodies during birth.

I’m convinced the location of my birth was the ultimate (though not only) reason we ended up in surgery to birth my first child. Although the list of reasons for chosing a home birth for the second birth was quite long, at the end of the day, I just really wanted to avoid another c-section. I wanted to experience the moment of birthing my child the way I was build to birth them and hear their first cry (something I didn’t get to do with the first because I was put under, as mentioned earlier).

The only problem with this plan? Whether I was going to be in the hospital or at home, I was still going to have to get through a grueling series of contractions before I could meet my baby.

There had to be a way I could withstand them without panicking and feeling out of control.

I am very happy to inform you that, although just as intense as the contractions with my first birth, our home birth contractions were manageable and so much better. I contribute that difference in experience to the strategies listed below!

2. Educate Your Person

Whoever your person is- whether your spouse, boyfriend, mother, best friend, doula- get them on the same birth page as you. I’ll be honest, I wasn’t successful at getting my husband to sit down and read through the birth books I had on our shelf. However, I was able to jot down notes and important parts and share those with him during our dinner and evening conversations. He learned a lot through these conversations, and I’m an external processor so it helped me process the information better.

Shawn knowing the key strategies I learned from these books meant when labor hit, and I didn’t have the capacity to explain to him how to help guide me, he already had the tools in his mind and could take action on his own. Some laboring information and tips will be of help to you- and some will not. Have enough birthing techniques on hand for you and your person that you can switch up to a different one during labor if the first techniques aren’t helping.

3. Embrace The Waves

I actually believe this strategy made the biggest impact on how I tolerated each contraction. If your contractions can be described as “painful” as mine were, this tip is essential.

As each contraction begins to swell, resist the urge to fight it. This sounds SO much easier than it is in practice. It will take your entire focus and will power. But you can do it.

As the peak of the sensation hit, I reminded myself to relax.

I found that if I tensed any part of my body while the contraction took over momentarily, I would lose control. The sensation would feel like too much for me to handle and I wanted to jump out of my body and run away. The result was pain down to my core as I screamed internally for someone to save me.

I’m always reminded why moms choose to receive pain medications at this point in the thick of laboring… contractions are so powerful. But I’m telling you, the contractions I gave permission to rush over me and didn’t fight? They lasted a shorter amount of time and didn’t give me an out-of-control sensation.

To my surprise, I also found the rest between contractions was much more pleasant. Instead of wallowing in self-pity of the work I had to do yet to meet our child, I was able to truly rest between with a happy and clear mind. I had peace and could tell myself, “You’re doing great. You conquered that contraction. You can handle this next one too.”

4. Think HUGE!

Ok, this one is going to get a little silly. Stick with me! It came from one of the stories in the Ina May book I recommend in my 7 Tips for a Successful Homebirth blog. Ina May was amazed by a mom who dilated SUPER quickly. She explains that her strategy was to quite literally, think about being HUGE! She says she pictured her cervix opening up super wide to allow her baby to move down and through.

This is a no judgement zone, right? I’m sure it sounded a little ridiculous in person, but I would actually say this out loud during a contraction. I would softly chant through my breathwork, “Get huge. Get huge.” and picture my cervix widening with each rush. Did it help my cervix open up faster? I like to think it did! But I truly don’t have any way to prove this. I can say though, it helped with my focus immensely, and your focus is what drives your ability to handle each contraction.

5. It’s All in Your Jaw

This strategy also comes from the Ina May book (check out the link in the previous bullet point). Ina May describes something called the Sphincter Law. Here’s the gist: your cervix a sphincter. It’s a muscle that opens and closes to allow things (in this case your baby) to pass through. In order to have your baby, as you know, your cervix has to open to 10 whole centimeters. There’s a connection between your jaw muscle and your cervix muscle. One of the ways to help open your cervix and speed up the process is to relax your jaw muscle while laboring.

In addition to that, relaxing your jaw muscle helps to release tension from your whole body. This is essential to withstanding contractions, as I mention in the previous bullet point.

6. Mindset is EVERYTHING

Food is important, right? We need food to survive. Additionally, good food is important. You can eat mediocre food and survive… but you’ll need to feed yourself nourishing food if you want to thrive.

Your mind functions the same way as your body. It is crucial to feed your mind healthy, truthful words, especially as you head into the birth of your baby.

It’s human nature to protect ourselves. In an event like birth, where it’s actually our own bodies inflicting that intensity upon us, it’s even more of a temptation to coddle yourself. Here’s something key you need to tell yourself as you go through this experience:

I am not a victim of this birth.

Do you feel the “woe is me” attitude leave as you say that to yourself? The struggles, afflictions, and trials of this life don’t make us less… we are not victims of them. We rise up and become stronger because of them.

Think about all the generations of women who have gone before us and done this successfully… they made it. Their babies came into this world and they survived.

And so will we.

Your body is incredible and you, as a woman, have been blessed with the most beautiful gift– to grow, birth, and nourish the next generation of people. It is a blessing to do this, not a curse. Remember that, and hold tight to what’s true during your labor. Write these things down and hang them up on your mirror to view every morning. Say them out loud. Talk about them with people who believe the same thing. These words are power to endure a long, difficult labor. Tap into that.

In Conclusion…

I am STOKED for your birth. Holding this baby in your arms is the end goal, but you don’t have to feel like you’re suffering to get there. Use these strategies to strengthen you with courage and power as you enter the hard work of labor- and then jump back onto this blog and let me know how it went! Blessings to you and your beautiful family.

Sincerely,

Jeannie

Filed Under: Parenting Tagged With: birth, birth strategies, labor, labor tips, laboring, med free birth, no epidural, pain free birth, pregnancy, unmedicated birth

7 Tips for a Successful Home Birth – From an HBAC Mom of Two

March 30, 2023 by Jeannie

It didn’t take long after the unexpected, traumatic crash cesarean section of my first born to decide that next time around, I wanted to do things differently. As I recovered from surgery and started researching all things birth, I came to the conclusion that a home birth was the way to go. After successfully completing our home birth just 3 weeks ago (baby girl is beautiful, and we are SO in love!), I’ve compiled 7 tips that I know will set you and your family up for a successful home birth as well.

The last few moments of laboring in the tub at our home birth, waiting the arrival of our surprise little girl!

A quick look at what’s in this blog:

  1. Tip One: Your Midwife Team
  2. Tip Two: Books
  3. Tip Three: Podcasts
  4. Tip Four: Doulas
  5. Tip Five: Envision
  6. Tip Six: Nest!
  7. Tip Seven: Protect your Plan

1. Tip One: Your Midwife Team

There is such a thing as “free birth” and I want to mention that briefly. It’s the process of having a baby at home without any medical or midwifery assistance. I know people who have done this and it was absolutely the right decision for them. I personally don’t have the guts to do a free birth- which I think is what most people uneducated in the home birth realm picture when you say you’re having your baby at home. So I can’t comment on a free birth experience.

However, I CAN speak for the incredible experience of having a qualified, trusted midwife team attend your birth. It can be difficult to find the right midwife, or to even find one in your area, but don’t give up on your search if you aren’t having any luck. We ended up finding ours purely through word of mouth- not through internet searches (though that’s a great place to start).

All midwives are different, and some have more training and capabilities than others. When we first met with the midwife we ended up hiring, my husband and I came loaded with questions. Things like, “What special care do you give VBAC patients?” and “What is your hospital transfer rate?” I quickly gained a trust as she described her practice and we talked about my hopes for this next birth.

My midwife team had the calmest demeanor- they didn’t flinch at anything, even when I hemorrhaged after birth. They used their expertise and discernment to make quick decisions about when and how much medical intervention was necessary. A good midwife team will have this same calm energy and swift action at your birth as well.

Midwives offer a bridge between the hospital and home birth world. They can’t perform c-sections or offer epidurals, but a well trained midwife will know some of the warnings signs and recommend a hospital transfer long before you are in the thick on an “emergency.” It allows you the headspace to “check out” while you are focused on laboring. You don’t have to think about every detail of what’s happening in your body or monitoring yourself because the midwives are doing that for you.

Many midwives have the training and tools to do things such as administer Pitocin, suture 1st and 2nd degree tears, offer IVs for fluid and antibiotics, deliver breech babies, offer some types of pain relievers (check out this other blog if you’re looking for natural ways to curb the pain of contractions!), monitor baby’s heartrate, and borrow you equipment such as birthing tubs just to name a few. You’ll want to find out if the midwives you’re considering can do some of these things if you want access to those services outside of the hospital. Our midwife team was able to offer all of the things mentioned here.

2. Tip Two: Books

Take this as you will, this tip comes rom a person who does not read. Like, ever. I actually wish I did because it seems like an appealing, leisurely thing to do- I just don’t. So when I recommend that you read these two books, I mean you really need to buy these and commit time in your life to read them.

Book One:

The first one is Ina May’s Guide to Childbirth by Ina May Gaskin. The first part of the book is flooded with incredible stories of women who have gone before us and successfully had their babies. The stories will inspire you, equip you, and nourish your imagination to help you prepare for your own baby to come into this world. In the second half of the book, Ina May breaks down the actual process of birth and educates you on technical things like the Sphincter Law, the Gaskin Maneuver (and the beautiful story of where she learned the technique from), and statistics on midwifery care vs. hospital care.

I actually think everyone who is even birthing at a hospital should read this book. Better yet, if you’ve even considered getting pregnant… or have just been someone who’s been born yourself, you should read this book (that includes everybody, in case you missed that). That’s how life changing it is.

Book Two:

The next book is called Natural Childbirth the Bradley Way by Susan McCutcheon, revised edition. This one doesn’t have the heart warming stories the Ina May book has, but it’s packed with incredible information on laboring strategies, the birth process, education on the female anatomy (even as a woman myself, I had no idea about some of these things), and even “signposts” to determine how far along you are in labor (and spoiler alert, it’s not dilation!).

3. Tip Three: Podcasts

I highly recommend surrounding yourself with as much birth information and inspiration as you can find. Listening to podcasts is an excellent way to accomplish this. Listen to them in the car, while you’re meal prepping, when your kids are down for a nap, etc. There are a TON of great podcasts about all things birth and homebirth out there. To name just a few, there’s…

The VBAC Link by Meagan Heaton

Happy Homebirth by Katelyn Fusco

Built to Birth by Bridget Teyler, and, my personal favorite…

Birthing Instincts by Dr. Stuart Fischbein and Midwife Blyss Young

Find one that sounds appealing to you and have a listen! I owe a big chunk of the success of my home birth to guidance and wisdom I stashed away in my mind from listening to these podcasts.

4. Tip Four: Doulas!

I’ll keep this short and to the point: get yourself a doula. Find a doula who you vibe with and hire them. The cost can seem like a lot (hundreds of dollars, upward to a thousand dollars), but I consider this an investment into one of the most important and sacred occasions of your life. If you’re going to spare a buck, your birth is not the place to make that compromise.

I see you over there reading this with squinty, skeptical eyes. Invite a stranger to your birth and spend THAT amount of money on someone who doesn’t provide any medical care like the midwives can? Let me just casually leave this list of things doulas offer you during labor right here..

  1. Emotional support
  2. Physical support (think counter pressure)
  3. Help guide your partner to assist you with strategies for the supports mentioned above
  4. Coach you through contractions with breathing and mindset techniques
  5. Feed you positive affirmations
  6. Comforting massage
  7. Rebozo techniques

That is by no means an exhaustive list. Not to mention the statistics that improve when a doula is present… (Taken from the infographic on this site. Sources are listed at the bottom.)

  1. 28% decreased risk for cesarean
  2. Shorter labors
  3. Higher APGAR scores for baby
  4. 60% less likely to ask for an epidural
  5. Fewer births where vacuums or forceps are used
  6. 40% less likely to need drugs to get labor started or sped up
  7. A reduction in pain meds of any kind being used

5. Tip Five: Envision your Birth

One of the things I practiced a lot to prepare for a successful home birth was to visualize it happening. I pictured myself going into labor. I thought about having contractions while playing with my toddler in his room. I envisioned contractions picking up speed as I got out my yoga ball to bounce on in the living room. I anticipated the moment I would slowly make my way into the dining room and slide into the warm water of the birth tub. I smiled contemplating the joy we would all feel once baby arrived and we’d finally find out if this long awaited gift was a girl or boy.

The beauty of a home birth is you’re not headed to an unfamiliar, numbered door in a sea of sterile hospital rooms. You are birthing in the sanctuary of your own home. Picturing the birth taking place in our home is one of the factors that I believe helped me get into the role so well once labor started. I was prepared and excited.. I had been “practicing” in my mind for this moment and I was ready.

6. Tip Six: Get Your House in Order and Nest!

This one may come naturally to my pregnant mamas out there. I cannot tell you how much more wonderful it made our homebirth experience to have our house clean, organized, and prepped for the birth ahead of time.

If there is clutter in your house that is bothering you, organize it and clear it out. An organized house allows for an organized mind, and you’re definitely going to want that while you labor. In my experience, less clutter = more peace.

Have a plan for where you want things like a birth tub if you plan to use one. Gather supplies for yourself and baby for immediately after birth (pads, comfy clothes, diapers, blankets, extra towels, and so forth). Have your pantry stocked with your favorite snacks for laboring and post partum.

After decluttering and planning the layout, I dug into my creative side and decorated the birth space. I printed off these floral coloring affirmation cards from Birth Uprising and hung them up where I knew we would be placing the tub. I hung a string of white Christmas lights in the room and put together a “welcome baby” basket filled with their first diaper, onesie, and a receiving blanket.

7. Tip Seven: Protect Your Plan

This tip is so important to having a successful home birth. Birth is 50% power, 50% focus. Your mindset- what you choose to believe is true about the aspects of birth and your capacity to birth a baby safely at home– is going to heavily influence your experience. My suggestion is to only share your birth plan with people in your life that you know will support your decision. Birth is a very vulnerable and personal thing to go through and the decisions you make for your family doesn’t have to be anyone else’s business.

Some people in your life, whether they be friends or family, will inevitably have strong feelings about how and where your birth should happen (even though your birth decisions don’t affect them at all). No matter how many statistics you share about the safety of home birth or the rates of devastating outcomes at the hospital, these people will always say you are putting yourself and your baby in danger by birthing at home. Don’t listen to them. And, if possible, don’t share your plans with them in the first place.

We ourselves didn’t share our home birth plan with certain close family members. How did we avoid that topic for 9 months? Actually, it was easier than I thought it would be. They knew we were pregnant of course, and asked us a few questions that we were able to answer without disclosing our birth location. When they mentioned the hospital a few times (not as a question), we just disregarded it and moved on.

If we were to have been directly asked by someone about our plans and didn’t feel comfortable informing them, we would have kindly responded with, “We are choosing not to share the details of our birth plan with everyone. We will definitely keep you in the loop as labor starts and baby is born!” Direct questions would have been things like, “Which hospital are you birthing at?” or “Who are you having deliver your baby?”

In Conclusion…

I pray peace and joy over the beautiful birth of your baby if you’re here reading this as you prepare for their arrival. You absolutely have it in you to birth this baby- and to have them in the comfort of your home. Remember to tell yourself that every day. Babies are such a blessing and I’m so grateful you’ve allowed me to share the things that helped us make our home birth so successful with you. If you already had your home birth, drop a quick comment below on which number baby you had at home and if any of these tips helped you out!

Sincerely,

Jeannie

Filed Under: Parenting Tagged With: birth, doula, HBAC, home, home birth, labor, midwife, pregnancy

Healthy Toddler Approved Apple Snack

March 29, 2023 by Jeannie

You are guaranteed to fall in love with this healthy apple snack. It’s super easy to make, tastes delicious, and is a toddler favorite. Plus, it’s a great low-mess car snack option (a HUGE win for my fellow parents who are on the road often… you know how granola bars and crackers absolutely disintegrate in the hands of a toddler!)

A quick look at what’s in this blog:

  1. Recipe back-story
  2. Ingredients
  3. Preparation
  4. 10 reasons we love this snack

1. Recipe Back-Story

It sounds funny but this snack was actually introduced to me by a coworker to try out during pregnancy. We shared about our struggle to eat literally anything (let alone more wholesome, nutricious food) during our pregnancies because of intense nausea and food aversions. She told me this snack got her through 3 grueling pregnancies where she was extremely sick. I was skeptical but gave this apple snack a try… and have been hooked ever since- pregnant or not! The snack was never intended to be tailored towards younger ones, but we quickly found out it’s a huge hit with the toddler in our house!

2. Ingredients

This list looks so simple, but don’t dip out yet… it’s the process of putting these ingredients together that brings out the stunning flavor, texture, and ultimate snacking experience of these apples. All you need is…

  1. Apples: I’ve done green, orchard fresh, grocery store, etc. I would just recommend they are a crunchy variation. It’s all about the crunch!
  2. Salt: Table salt, sea salt… whatever you have works great!
  3. Limes: You can use fresh limes or bottled lime juice if you have that on hand. You can definitely use lemons/lemon juice instead, but it’s doesn’t give quite the same pop of flavor.
  4. Optional… chili powder/cayenne pepper: This is for the those who want to “level up” this snack. I personally like them best without the added spice, but it’s delicious both ways!

3. Preparation

This is where the magic happens. It’s all in the perfection of the slice thickness. I begin cutting the apple by “chunking” it. See the progression of the pictures below:

I make the first cut slightly off-center from the core
I then turn the apple 45 degrees and make my second cut
Third cut
Last “chunk” cut

After that, I trim the apple into “slivers.” This is where the magic happens. The key is to cut them thin, but not too thin. A few attempts at this step and I have no doubt you’ll quickly land on the perfect thickness. Just know it may take a few tries. To accomplish this, I lay the apple chunks on their “bellies,” flesh side down (skin side facing up).

Using my first “chunk” to start cutting into “slivers”
Continuing to cut “slivers”
You’ll end up with a few end pieces… don’t try too hard to cut this last inch or so
This is that end piece I mention in the last picture caption. Just pop that sucker in your mouth and move on. It’s not worth fighting with… it’s usually a loosing battle and your fingers are worth more than that!

Once you’ve sliced your apples, cut your limes in half and gently move the apples around while you squeeze the lime juice over them. This helps to distribute the lime juice evenly.

Can you really ever have too much lime juice?

Once you have the desired amount of lime juice (we like to DOUSE ours), sprinkle on the salt. You can mix around the apple slices to distribute the salt carefully as well.

Don’t go crazy with the salt. A little goes a long way.. and you can always add more once you taste test it!

If you’ve chosen the chili/cayenne pepper route, you would sprinkle this on last.

And wa-la! I invite you to try out various slice thicknesses and different amounts of lime juice/salt until you find the combination that hits the spot.

4. Why We Love This Snack So Much

If your mouth isn’t watering yet, maybe one of these ten reasons will convince you to try out this recipe. 10 reasons we LOVE this snack:

  1. Toddlers love it (and isn’t the ultimate struggle getting them to eat more than just chicken nuggets dipped in copious amounts of ketchup?)
  2. Low mess level.. unlike dry cracker snacks!
  3. Easy for on the go- just stick them in a baggie or sandwich container
  4. Quick to make
  5. Ultimate flavor combination of sweet, a little bit sour, and salty
  6. Apples have different types of sugar in them that help to give you long-lasting energy
  7. Salt is GOOD FOR US! The sprinkle of salt on these adds amazing flavor, but also the benefits of electrolytes that our bodies crave and need to function optimally
  8. Limes are high in vitamin C (do I sound like your doctor yet?)
  9. These are a no-guilt snack. You don’t have to feel bad about eating the whole bowl to yourself!
  10. Most importantly (in my opinion), these are so fun to eat. Between the crunch and salty flavor, this snack gives you an experience similar to eating potato chips. Are they potato chips? No. But do I feel better after eating these vs. potato chips and they are just as fun to snack on? YES!

In Conclusion…

I really hope you’ll give this amazing apple snack a try. You might just find yourself addicted and making this weekly (sometimes daily) like our family does. Have fun… and happy parenting those littles!

-Jeannie

Filed Under: Parenting Tagged With: apple, apple slices, easy snack, healthy, quick snack, snack, toddler, toddler snack

How to Open Up a Load Bearing Wall- Without Contractors or Inspections

March 3, 2023 by Jeannie

If you’re anything like us and don’t currently live in the house of your dreams, you may be itching to make some drastic changes to the floor plan. Since the first day of moving in, my husband and I wanted to tear down part of the wall separating the dining room/kitchen from the living room. One GIANT problem? The wall is load bearing. We didn’t have the income to get experts involved, so we came up with an innovative way to open up the space WITHOUT the need for contractors or inspections!!

A quick look at what’s in this blog:

  1. What are load bearing walls
  2. Our design idea
  3. Executing the project
    • Creating the opening
    • Framing out the rough-cuts
    • Painting and finishing touches

1. What are Load Bearing Walls?

Load bearing walls are walls in your house that support the main structure.. like your roof. Walls are made of either 2x4s or 2x6s called studs. They are usually spaced out every 16 inches, and covered with sheet rock. If you are thinking about taking down or altering any wall in your house, you definitely want to find out if it’s load bearing or not. There’s quite a few tricks to determining this, but typically it’s walls in your house that have walls directly above or below them… or if the wall travels perpendicular to the joists in your basement. Here’s a Home Depot article that gives a lot more information on this topic.

Here’s the problem DIYers like ourselves run into when hoping to alter load bearing walls…

You should not alter or remove a load bearing wall without a certified contractor doing/overseeing the project. Cutting into the 2x4s or 2x6s of a load bearing wall without providing proper support during the demo part (and headers once your opening is established) means you are jeopardizing the integrity of the building structure. Not good.

So maybe you’re feeling a little bummed out because the wall you have your eyes on tearing down is load bearing. Don’t give up on your home makeover dreams just yet! We came up with a genius way to accomplish an “open feel” without the need to actually alter the structure of the wall.

2. Our Design Idea

After scouring the internet for days and not finding a solution, I was tempted to throw in the towel. Until one night my husband casually said to me, “What if we remove the sheet rock from the wall but leave the studs (2x4s, in our case) in tact? And that folks, was the moment of conception for this DIY project.

As mentioned above, the entire issue of opening up a load bearing wall is that the studs give these walls their support. So instead of removing them, we decided to work around them! This allows for light to pass through, opens up the view between the rooms, and gives you an “open concept” feel. All while leaving the support of your load bearing wall untouched- and eliminating the need for contractors and inspections!

3. Executing the Project

First, we located the studs with a stud finder and traced them out on the wall.

We traced out the locations of the studs and then decided how many “spaces” we wanted to open up.

We decided it would look best in our house to open up 3 “spaces.” This would expose two studs. I vividly remember the moment my husband smashed the hammer into the wall for the first time… there was no turning back after that! Full steam ahead!!

Next, we used a combination of a sharp box cutter knife and a jig saw to cut around our established opening and remove the sheet rock.

We removed the sheet rock from each side, taking special care not to cut into the studs.

This is the most important part of this blog: Make sure, however you choose to remove the sheet rock, that you DO NOT CUT INTO THE STUDS. People, please. I believe in you. I trust your DIY skills at this point. Don’t let me down now and mess this up.

After that we cleaned up the cuts that weren’t super straight and stood back to admire the giant hole in our wall!!

Admiring our work thus far, and envisioning the final product…

Can take a moment to appreciate how far our dinning room and kitchen have come?? (Peek at the final product photo to get an idea of all the changes we’ve made.)

Next, we started framing out the rough edges of the open sheet rock.

Beginning the framing process

We used 1x2s for the vertical outside edges. 1x3s were utilized for the bottom and top pieces. To accomplish this, we held them up until they were flush with the edge of the cut sheet rock and nailed them into the studs.

After that, we created the lower ledge.

Marking where to cut for fitting the ledge of the opening around the studs

To create the ledge of the opening, we measured carefully and used two boards that met (sort of) in the middle. To work around the studs, we simply cut two notches in each board, pushed the boards together, and nailed them into place. We measured so that there was a half inch overhang as well.

Here’s what the finished lower ledge looks like

Then we repeated that same process to create a closure for the top. This time we did not have the boards extend a half inch off the edge like the lower set. We made them to be flush with the outer framing boards.

Installing the upper inside framing

The next framing pieces we put up included the inside verticle wood and the wood to frame the studs themselves.

We could have left the 2x4s as they were, but the wood used for studs is usually rougher and doesn’t have the clean, crisp edges we wanted. So, we used a fairly thin craft wood, cut it down to the proper sizes, and “wrapped” the studs in this.

Setting up and nailing the craft wood into place
Adding the last few pieces of craft wood to the studs to get that “finished” look

This part felt a little tedious but I can confidently say it paid off. The studs look like they are there on purpose now, and not just something to pretend you don’t see. Wrapping them in pieces of craft wood gives them the finished look we hoped to achieve with this project.

That left us with just the cosmetics to complete it! We concluded the project by caulking all the seams (and there are a lot!) and painting it to match the white of our board and batten wall.

Taping off and painting the boards

At last, my fellow DIYers, we have the beautiful finished product (in case you skipped by the picture earlier!)

The final product

In Conclusion…

If you happen to find yourself wanting to alter a load bearing wall without the hassle or cost of involving the experts, I hope this idea will be a great solution for you- or spark another creative way to accomplish this!

The great part is the versatility of this project. You can bust through the sheet rock between as many studs as you’d like, choose how high to the ceiling or low to the ground you want the opening to be, etc. Get creative, make it your own, and have fun!

And don’t forget- if we can do it, you can too!

Sincerely,

Jeannie and Shawn

Filed Under: DIY Projects Tagged With: Budget, DIY, diy project, Home Improvement, home renovation, load bearing wall, no contractors, no inspections, wall opening, wall removal

Creating a Simple and Elegant Breakfast Nook on a Budget

February 28, 2023 by Jeannie

It has been one of my dreams to create booth style seating in our dining room. At 34 weeks pregnant, my nesting instincts kicked in hard and my husband and I decided to make that dream come true. We came up with a very simple and budget friendly design that can be replicated or used as inspiration for your own breakfast nook creation!!

A quick look at what’s in this blog:

  1. Creating your design
  2. Acquiring supplies
  3. Building the supports
  4. Putting it together
  5. Finishing touches (Jump ahead to this part for some great money saving tips and a non toxic paint stain option!!)

1. Creating Your Design

This seems like such a simple step in a DIY project, but it’s usually the most important. First, you need to establish the spot you want the breakfast nook and determine if there’s enough space to seat the number of people you want at your table comfortably. We went through many design ideas, including an L-shaped bench that wrapped around the back and one side of the table. We ultimately decided on a “restaurant” style booth seating, with two separate benches on either side of the table. One side is nestled up against the wall and one bench is left open-backed. (For reference, we wanted a seating area that would comfortable seat 4 adults.)

You can sketch your idea, draw it to scale in an online design program if you are familiar with one, or like us, piece together things you already have in the house to “get a feel for it.”

We used a bench we had from our kitchen, a stray chair, and my son’s play table to get a feel for spacing and design

We decided we were happy with the spot, spacing, and design, and moved on to getting the building supplies we needed!

2. Acquiring Supplies

For a similar design to ours, you can absolutely get two slabs of wood from the hardware store and cut them down to size for the benches. Additionally, another piece of wood can be purchased for the table top. The cost of this project will be largely determine by the type, quality, and thickness of wood you go with for these pieces.

For our project, however, we repurposed some old materials and saved some big bucks in the process. My husband and I are a little obsessed with upcycling materials and finding things at the thrift store as often as we can. This project was definitely no exception! For the benches, we used wood from an old free church pew we got our hands on. The table top was actually the top stripped off of our old living room coffee table that wasn’t in use anymore. The cushions we used to upholster the benches with were also from the free church pews.

My suggestion, if you can’t get your hands on scrap wood and want to be super frugal with this project, is to look for benches/tables on Facebook Marketplace. You may find something for really cheap that you can strip apart (for example, if it’s a table, just remove the legs and wa-la!).

Here is a quick list of all of the supplies we used:

  1. Wood for the benches
  2. Wood for the table top
  3. Screws
  4. Small metal L-brackets
  5. Leg posts (4x4s)
  6. Wall braces (2x4s)
  7. Wood stain (from ECOS paints)
  8. Paint (leftover from painting the wall)
  9. Foam for the bench cushions
  10. Material to upholster the benches

3. Building the Supports

This is the first support bar we installed that the inside bench would eventually rest on

We kept the support design super simple. This ultimately helped keep the cost down and allows others, like yourself, to easily duplicate the process. For the support of both the benches and the table, we screwed 2x4s into the studs in the wall. I included a few images to demonstrate this.

Here you can see the finished support system installed before we placed the benches on. You can also see we added a vertical support for the table part that’s against the wall to hold it at the desired height.

Don’t worry, just off to the side of the last picture is my husband on full-child duty while my “big helper” pretends to use the drill. 🙂

We first located and marked off the studs in the wall. You absolutely want to drill these boards into studs… drilling them into just the sheet rock will not give you the support you need to sustain any amount of weight on your benches or table.

Then, we measured how far out we wanted these support boards from the corner of the wall and cut them. We wanted them to stop at the ends of the benches and not protrude beyond them.

You can see the edge of this board was angle cut to hide it the best we could when you are standing back looking at it

To support the outside edge of the benches and table, we wanted a clean, streamline design that looked consistent and functioned well. We went with big 4×4 wood posts, centering them on both benches and the table.

(At first we tried two legs at the outside end of the table, and let me tell you.. it was near impossible to slide into the benches comfortably without running into the table legs. Because we went with a smaller size table for our design, we are happy with the stability of the one centered wood post. You can certainly play around with this and try out a different design for your specific space and dimensions.)

4. Putting it Together

Now comes the fun part! Once you have the support wood in place, all you have left to do is cut the square posts to the corresponding heights for the benches and table and screw everything into place. You’ll want to make sure the wood posts are cut so the support is level with the height you chose for the 2x4s that are already attached to the wall.

This is how we used the small metal L-brackets to attach the support posts to the benches and table
We also used a few small metal L-brackets to secure the benches to the 2×4 support boards. (The horizontal corner L-bracket pictured is not necessary, my husband just likes to add extra stability where he can!)

We decided to upholster our benches before attaching them. This is completely up to your style preferences if you wish to do this. I’ll have a blog coming soon on a SUPER simple, one-tool way to do this.

For reference, these were the measurements of our specific design:

  1. Dimensions of benches: 50″ deep X 14″ wide X 19″ high
  2. Dimensions of table: 50″ deep X 30″ wide X 28″ high
  3. Distance between the inside edge of the benches and the edge of the table: 6.5″

5. Finishing Touches!

Ok, I know I said the last section was the fun part, but this is probably the actual fun part: tying it all together visually. For the support boards, I wanted the bits you would see between the benches and table to blend into the background so I painted them the same color as the wall.

The benches I upholstered with a thick, vinyl, wipeable fabric from Joann’s (and used a 50% off coupon… I was able to get enough fabric to upholster both benches for under $25!!). I HIGHLY recommend using a durable, wipeable fabric since this is an eating area…. especially if you have little at home like myself.

The wood post supports I used wood stain on. We used ECOS wood stain and I could not have been more impressed.. First of all, here’s a little tip. They sell sample sizes (2oz.) for fairly cheap and they ship for free. As of the date I’m writing this, if you buy 3, you get a $10 coupon off your next purchase of a gallon or more of their product. (We bought 3 sample sizes of the Spiced Pecan and we only used 1 and a half for reference.)

Secondly, the website touts no-VOC and low/no odors. I have a very sensitive nose (minus the fact I’m pregnant right now and want to avoid chemicals whenever possible) and LET ME TELL YOU…. We literally COULD NOT smell it. I was actually blown away. So was my husband… and he’s not easily impressed. It stained beautifully in just a single coat. We even stained it indoors during winter and had no issues with that whatsoever.

As for the table top, I threw on my favorite table cloth and called it a day. And I have to brag about this table cloth for a second. It’s held up for years with a baby and now toddler and well, frankly, my husband says I’m pretty messy too so there’s that.

It’s neutral and goes with any season and additional decor in the room and washes SO well. I’ve had to put in some elbow grease to get a few tomato stains out, but to my surprise, every single stain has always disappeared completely once I send it through the washer. Plus it comes in multiple sizes and did I mention it’s just really cute??

If you are in love with the hanging light like I am, I hate to tell you this.. but it was a thrift store find (for only $12!!). We stained the wood post legs dark to tie in with the amber color of the light and you guys… it came together perfectly. This next picture doesn’t do it justice but look at the ambiance in the evening time. I’m obsessed!!

In Conclusion…

You got this!! If you are creating a breakfast nook in your house right now, I just want you to know ahead of time.. you will not regret it. It turned our eating area into a closer-knit, more intentional moment of the day. We have bonded in a special way as a family in this little corner of our house. I know you will in your home as well.

I hope this blog has inspired you to be frugal and keep the design simple… and to give this project a try! Add in your own design touches and tailor it to serve your family and home perfectly.

And remember… if we can do it, you can too!

Sincerely,

Jeannie and Shawn

Filed Under: DIY Projects Tagged With: Breakfast Nook, Budget, Build, Creating, DIY, Home Improvement

Primary Sidebar

Social Media

  • Email
  • Facebook
  • Instagram
  • Pinterest

Hey there- thanks for stopping by! I’m Jeannie Harris, a stay at home mother of two, wife to the funniest guy on the planet, and soon to be retired science teacher. Read More…

Copyright © 2025 Harris Home DIY on the Foodie Pro Theme