If you’re anything like us and don’t currently live in the house of your dreams, you may be itching to make some drastic changes to the floor plan. Since the first day of moving in, my husband and I wanted to tear down part of the wall separating the dining room/kitchen from the living room. One GIANT problem? The wall is load bearing. We didn’t have the income to get experts involved, so we came up with an innovative way to open up the space WITHOUT the need for contractors or inspections!!

A quick look at what’s in this blog:
- What are load bearing walls
- Our design idea
- Executing the project
- Creating the opening
- Framing out the rough-cuts
- Painting and finishing touches
1. What are Load Bearing Walls?
Load bearing walls are walls in your house that support the main structure.. like your roof. Walls are made of either 2x4s or 2x6s called studs. They are usually spaced out every 16 inches, and covered with sheet rock. If you are thinking about taking down or altering any wall in your house, you definitely want to find out if it’s load bearing or not. There’s quite a few tricks to determining this, but typically it’s walls in your house that have walls directly above or below them… or if the wall travels perpendicular to the joists in your basement. Here’s a Home Depot article that gives a lot more information on this topic.
Here’s the problem DIYers like ourselves run into when hoping to alter load bearing walls…
You should not alter or remove a load bearing wall without a certified contractor doing/overseeing the project. Cutting into the 2x4s or 2x6s of a load bearing wall without providing proper support during the demo part (and headers once your opening is established) means you are jeopardizing the integrity of the building structure. Not good.
So maybe you’re feeling a little bummed out because the wall you have your eyes on tearing down is load bearing. Don’t give up on your home makeover dreams just yet! We came up with a genius way to accomplish an “open feel” without the need to actually alter the structure of the wall.
2. Our Design Idea
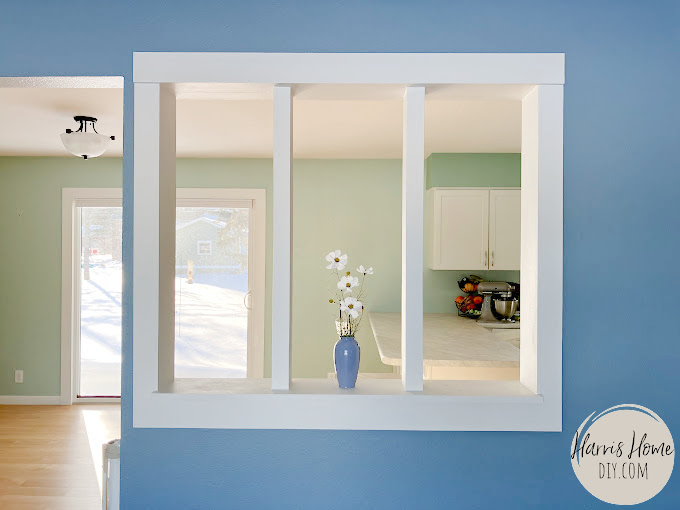
After scouring the internet for days and not finding a solution, I was tempted to throw in the towel. Until one night my husband casually said to me, “What if we remove the sheet rock from the wall but leave the studs (2x4s, in our case) in tact? And that folks, was the moment of conception for this DIY project.
As mentioned above, the entire issue of opening up a load bearing wall is that the studs give these walls their support. So instead of removing them, we decided to work around them! This allows for light to pass through, opens up the view between the rooms, and gives you an “open concept” feel. All while leaving the support of your load bearing wall untouched- and eliminating the need for contractors and inspections!
3. Executing the Project
First, we located the studs with a stud finder and traced them out on the wall.
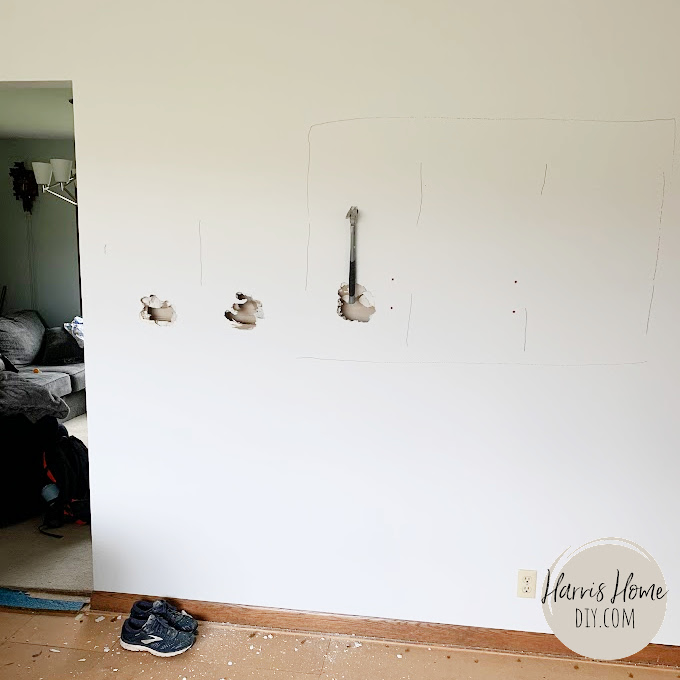
We decided it would look best in our house to open up 3 “spaces.” This would expose two studs. I vividly remember the moment my husband smashed the hammer into the wall for the first time… there was no turning back after that! Full steam ahead!!
Next, we used a combination of a sharp box cutter knife and a jig saw to cut around our established opening and remove the sheet rock.
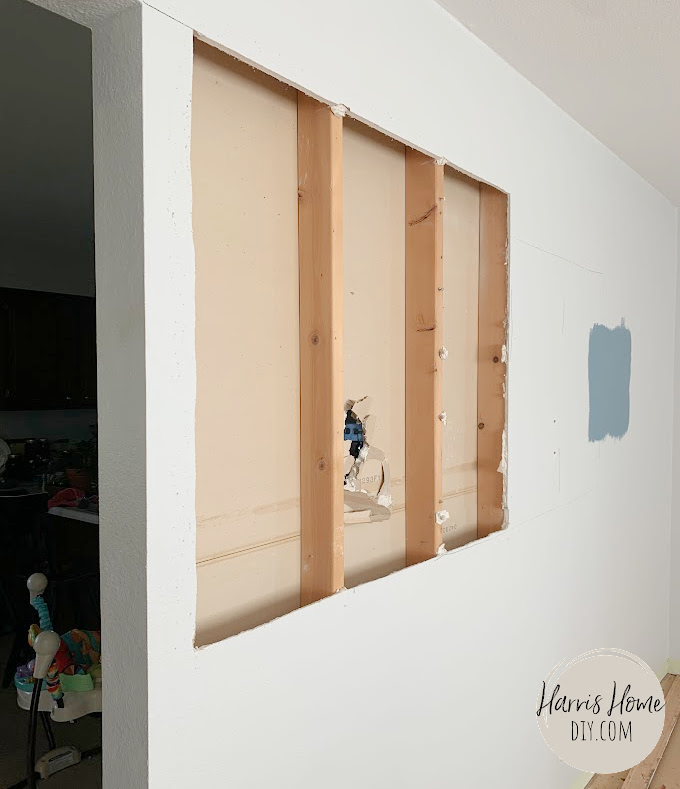
This is the most important part of this blog: Make sure, however you choose to remove the sheet rock, that you DO NOT CUT INTO THE STUDS. People, please. I believe in you. I trust your DIY skills at this point. Don’t let me down now and mess this up.
After that we cleaned up the cuts that weren’t super straight and stood back to admire the giant hole in our wall!!
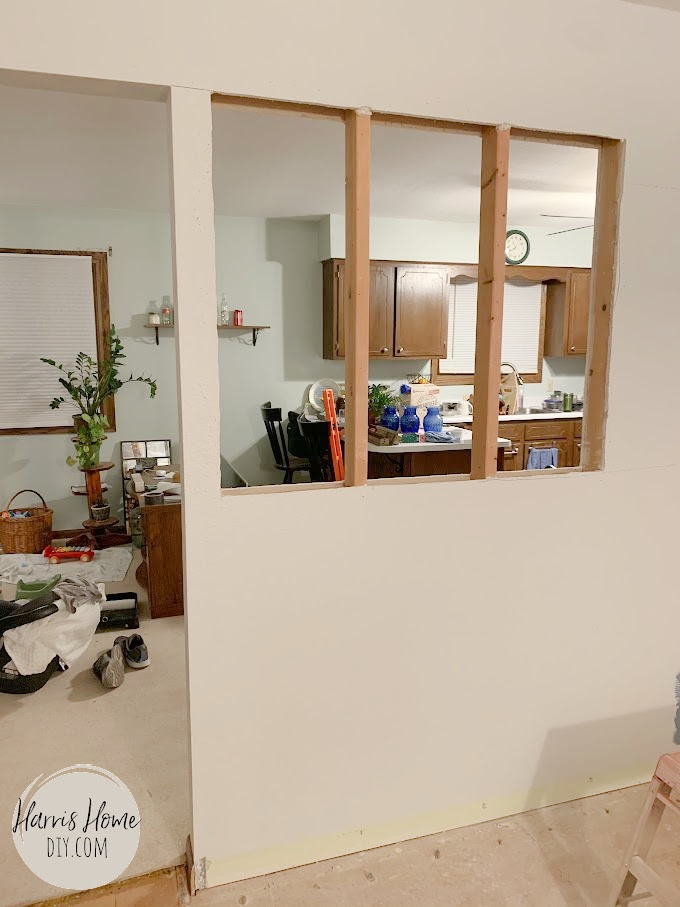
Can take a moment to appreciate how far our dinning room and kitchen have come?? (Peek at the final product photo to get an idea of all the changes we’ve made.)
Next, we started framing out the rough edges of the open sheet rock.
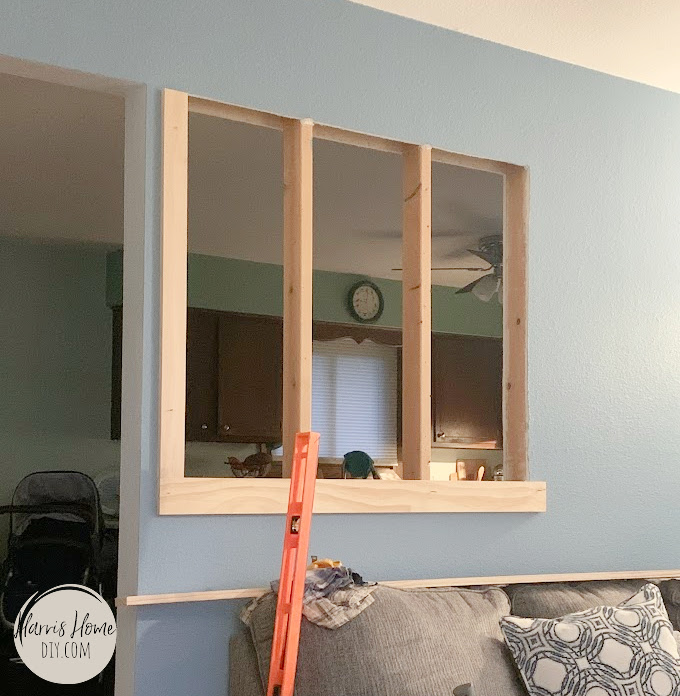
We used 1x2s for the vertical outside edges. 1x3s were utilized for the bottom and top pieces. To accomplish this, we held them up until they were flush with the edge of the cut sheet rock and nailed them into the studs.
After that, we created the lower ledge.
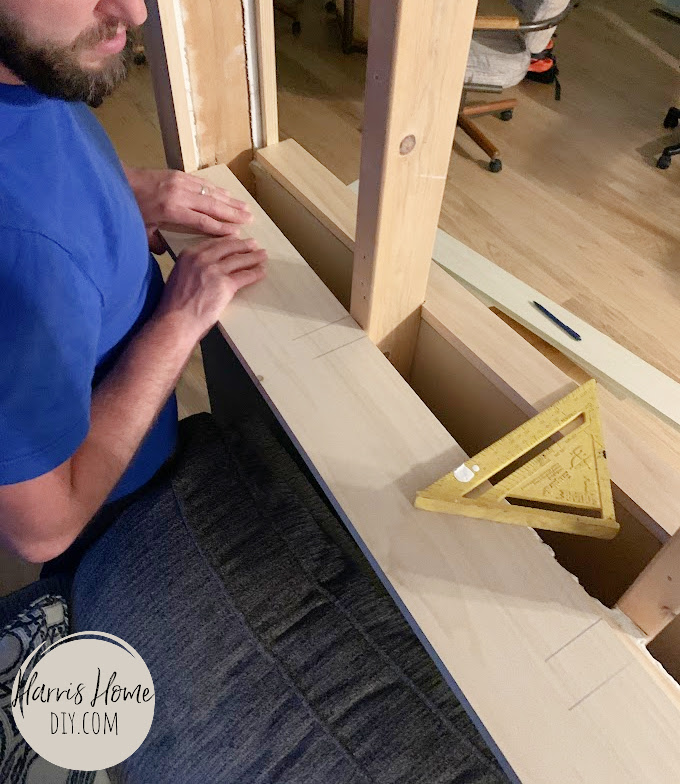
To create the ledge of the opening, we measured carefully and used two boards that met (sort of) in the middle. To work around the studs, we simply cut two notches in each board, pushed the boards together, and nailed them into place. We measured so that there was a half inch overhang as well.
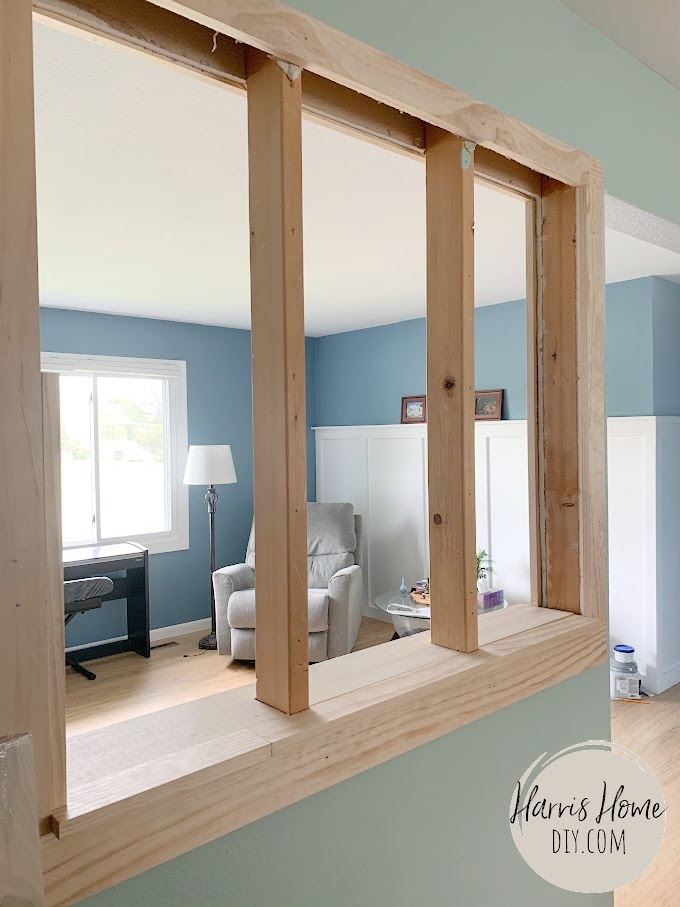
Then we repeated that same process to create a closure for the top. This time we did not have the boards extend a half inch off the edge like the lower set. We made them to be flush with the outer framing boards.
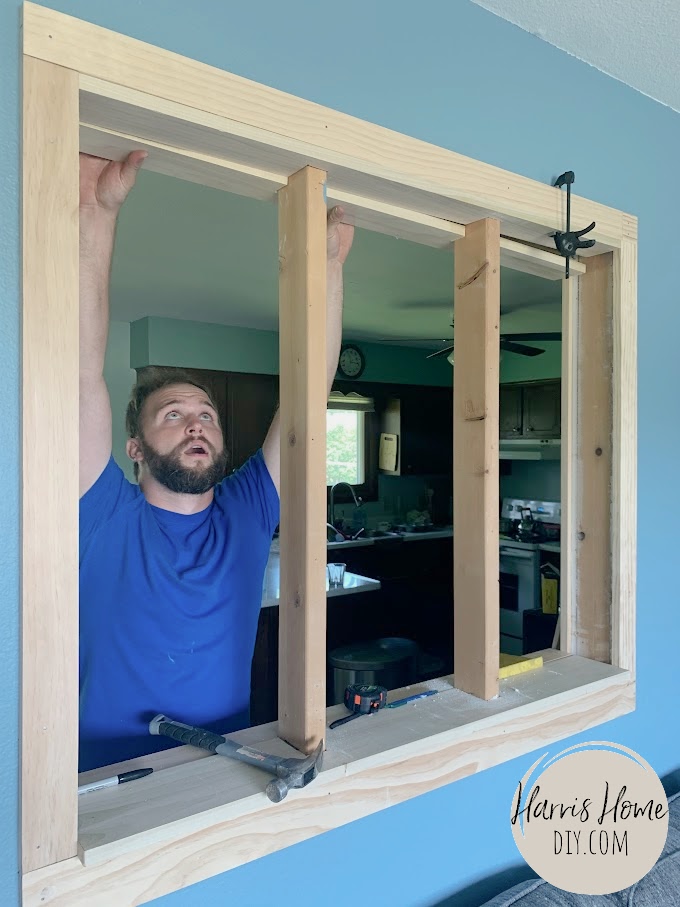
The next framing pieces we put up included the inside verticle wood and the wood to frame the studs themselves.
We could have left the 2x4s as they were, but the wood used for studs is usually rougher and doesn’t have the clean, crisp edges we wanted. So, we used a fairly thin craft wood, cut it down to the proper sizes, and “wrapped” the studs in this.
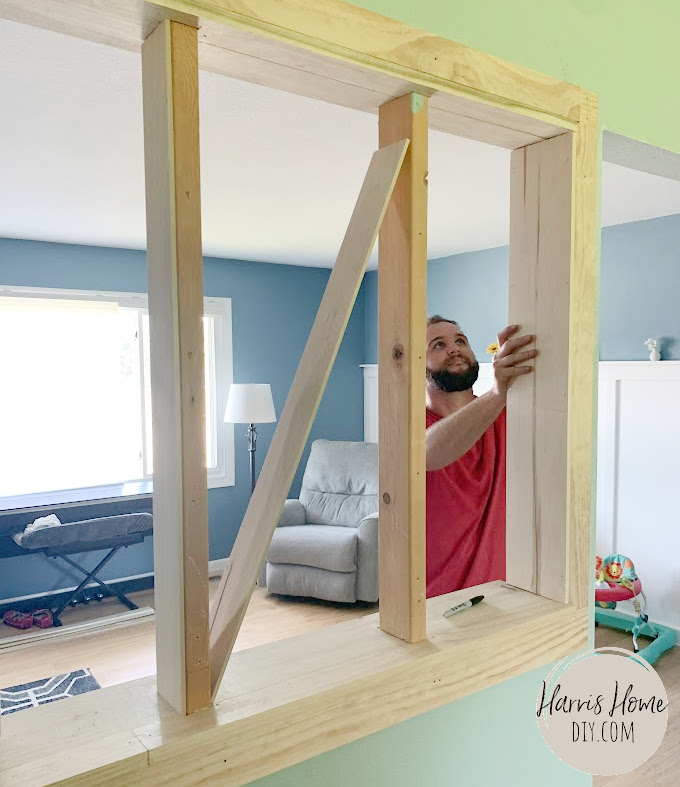
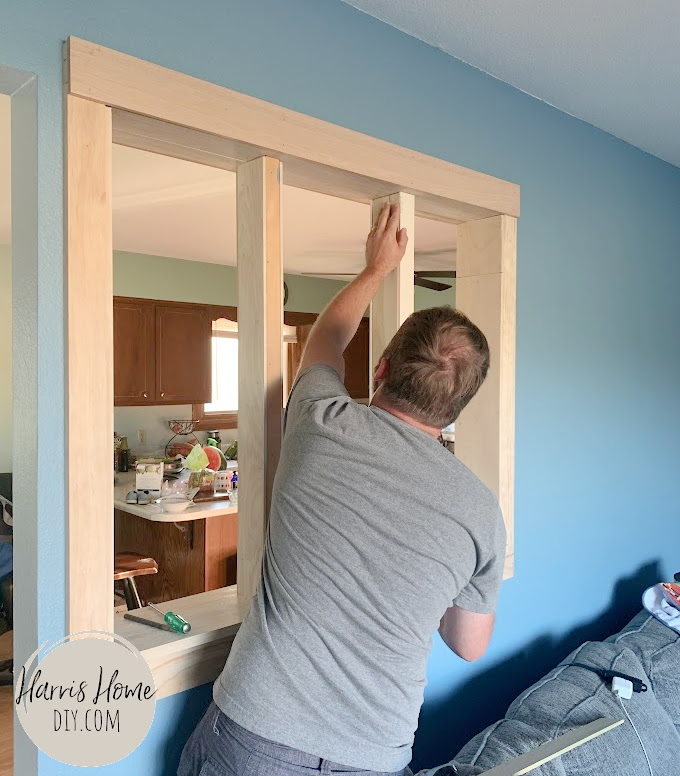
This part felt a little tedious but I can confidently say it paid off. The studs look like they are there on purpose now, and not just something to pretend you don’t see. Wrapping them in pieces of craft wood gives them the finished look we hoped to achieve with this project.
That left us with just the cosmetics to complete it! We concluded the project by caulking all the seams (and there are a lot!) and painting it to match the white of our board and batten wall.
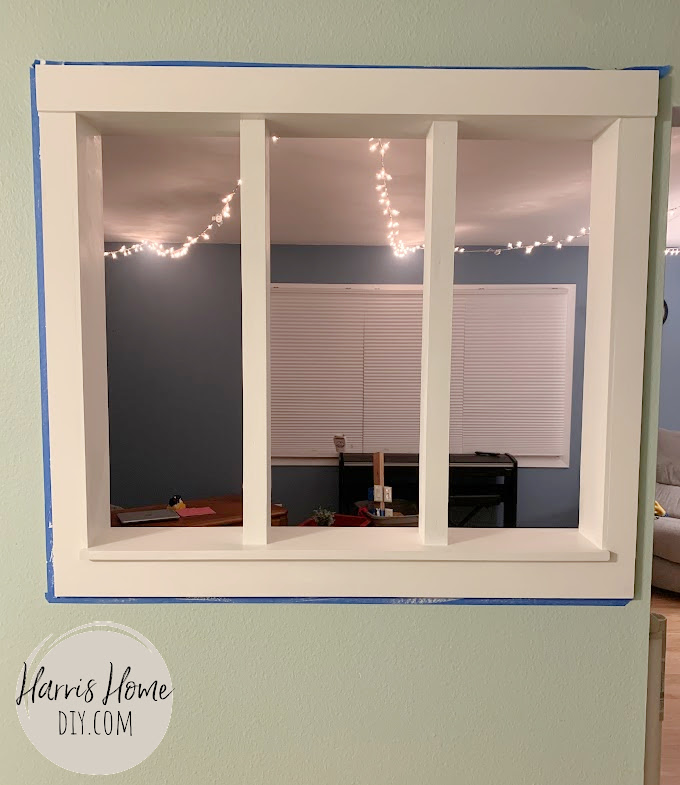
At last, my fellow DIYers, we have the beautiful finished product (in case you skipped by the picture earlier!)
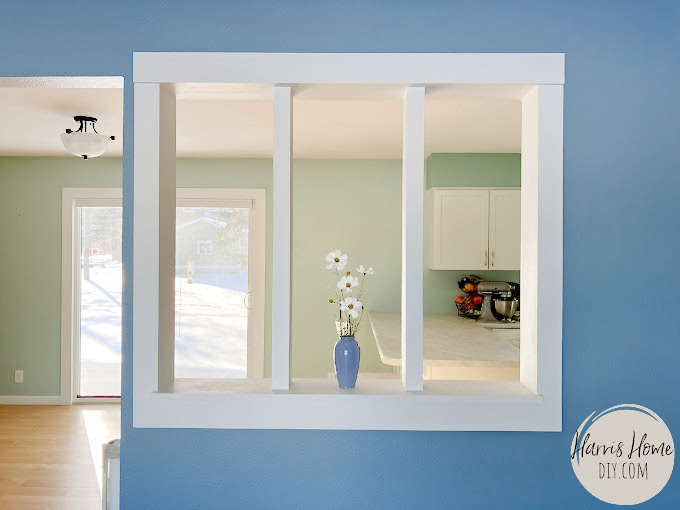
In Conclusion…
If you happen to find yourself wanting to alter a load bearing wall without the hassle or cost of involving the experts, I hope this idea will be a great solution for you- or spark another creative way to accomplish this!
The great part is the versatility of this project. You can bust through the sheet rock between as many studs as you’d like, choose how high to the ceiling or low to the ground you want the opening to be, etc. Get creative, make it your own, and have fun!
And don’t forget- if we can do it, you can too!
Sincerely,
Jeannie and Shawn
