*Cringy infomercial voice incoming* Do you live in a house that doesn’t have an exit to the backyard? Do you find yourself daydreaming of installing a human-sized doggy door in the wall so your kids can run out there and play without having to walk all the way around the house or trudge through the garage to get there? Then we have the solution for YOU!!
But in all seriousness.. This was hands-down the biggest game changing DIY project we’ve done to date. If you are like us and have a window in your dining room (if it faces the backyard) but no exit except maybe through a garage and front door, this is absolutely a project you should consider. If you’re curious how difficult this actually was and what details to consider before jumping in, keep reading!!
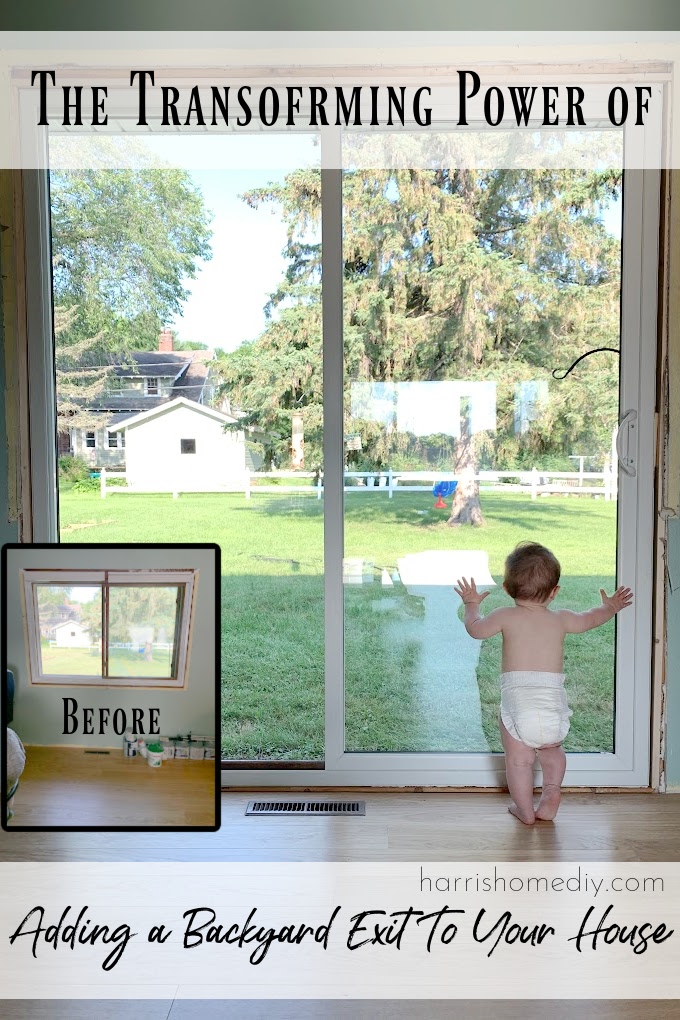
A quick look at what’s in this blog…
- Why we did it
- Things to consider if you’re doing this project
- How difficult was it?
- How we did it
- The benefits of having a backyard exit
1. Why We Did This Project
It seems like a no-brainer now but the idea didn’t come to us immediately after purchasing this house. It was a bit of a bummer the only way out to our backyard was either through the front door or garage. After having our first child, I knew we’d want easier access to the backyard for him to play and explore- I just never thought it would actually be a possibility.
Until one day my husband, in his infinite DIY wisdom, looked over at the window in our dining room (that faces the backyard) and said, “What if we just pop out that window and switch it to a door?” My jaw dropped to the ground. How had I never thought of that.. (And this, my friends, is one of the many reasons I’m glad I married this man.)
I couldn’t stop thinking about the convenience and practicality of having a door there instead. We quickly went to work finding out what would need to be done to make this a reality.
2. Things To Consider If You’re Doing This Project
We learned a lot through this process and I know this information will be very helpful if you’re considering this project (which you really should!).
- Width of window: You absolutely can make the opening for your door of choice wider than the existing window but that’s going to require contractors. This is because chances are your exterior walls are load bearing and they’ll need proper support when altering them. (Check out my blog on altering load bearing walls for more info.) However, if you are lucky like us and the width of the window is a standard door width (32″, 30″, etc. for swing doors or wider for sliding doors), then this may be a great DIY project for your house.
- Electric: There’s a chance you have wires running through your wall below your window. We took the super risky chance of not consulting an electrician before ripping off the inside sheet rock and *huge sigh of relief* we DIDN’T have any wires there. You’ll want to find out if there are wires in your wall too. If there’s not, there’s no need for a specialist. If you do have wires, talk with your electrician about the option to reroute them and the cost involved in that.
- HVAC: There’s another structure you want to make sure won’t be in the way when you tear down the wall below the window. If you suspect you have any heating or cooling ducts/equipment in that part of the wall, talk with a specialist about your options and the cost involved. We got super lucky again and didn’t have any HVAC in the way. Our duct comes up through the floor right in front of the door, but is not located in the wall.
- Permits: This one is completely dependent upon the area you live. Before you do any demo work on this project, you’ll want to contact your county and ask about the rules and regulations. When I talked with the building permit person in our area and explained what we intended to do, they (amazingly) informed us we didn’t need a permit. I was actually a little shocked by this. For our area, we were told that as long as there was no wiring, no HVAC, we were not making the window opening any wider (which we weren’t), and the height from the floor to the ground outside wasn’t too high, we were in the clear! We didn’t need inspections or permits and could proceed with our project. I’m telling you, we couldn’t have been any luckier with this. I’m hoping you will be too!!
3. How Difficult Was This Project?
Honestly, it looked far more difficult than it ended up being. We went into it with all hands on deck (we had Shawn’s dad, grandpa, and brother-in-law over to help). The hardest part was framing it up on the exterior side afterwards. We had to make sure it was weather proof and we had to be careful not to cut into the siding in areas that it needed to stay intact (we didn’t have extra siding pieces laying around to patch it up if we made a mistake here). This project did require a few special tools, such as a Sawzall to cut away the wall and outside house trim. Your project may be easier or more difficult, it really just depends on the details of your house.
I wouldn’t recommend this project for a brand new DIYer. However, if you have some experience with various DIY projects and tools at this point, and feel confident about tackling this, it’s TOTALLY worth it in my opinion. The benefit of having a backyard exit to your house is indescribable!
4. How We Did This Project
Once we considered all the details I mention in section 1 and created a game-plan, we started the demo process.
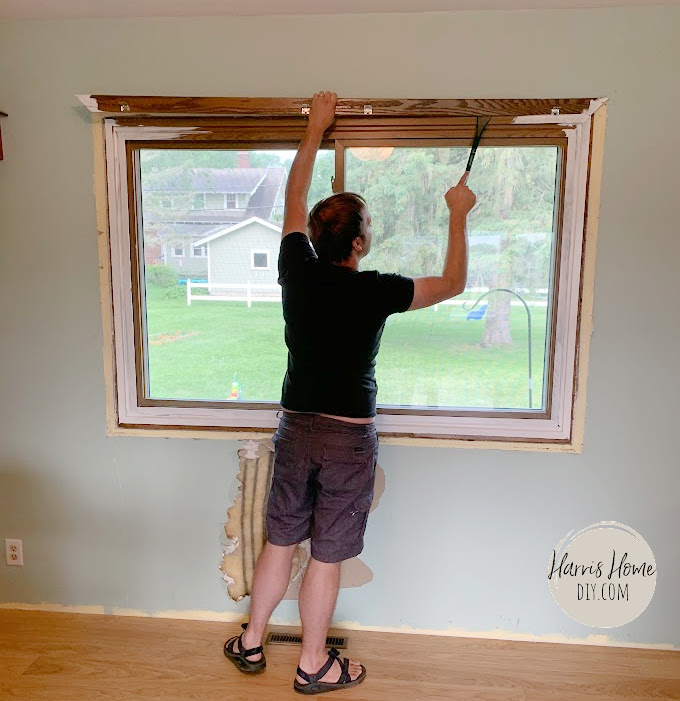
After stripping the trim off the window, we busted through the sheet rock (my personal favorite part) and removed the insulation.
Then we dismantled the window and removed the screen and frame.
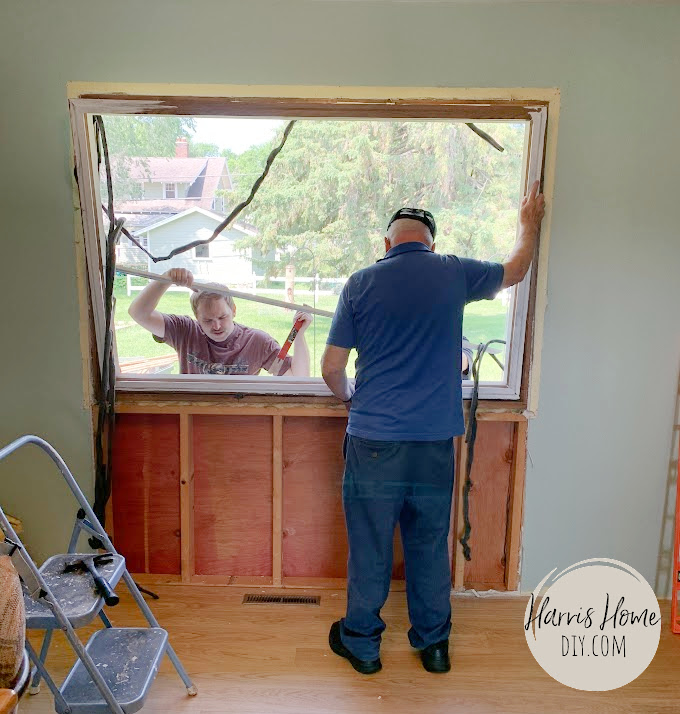
Time for cutting and pushing out the wall below the window!
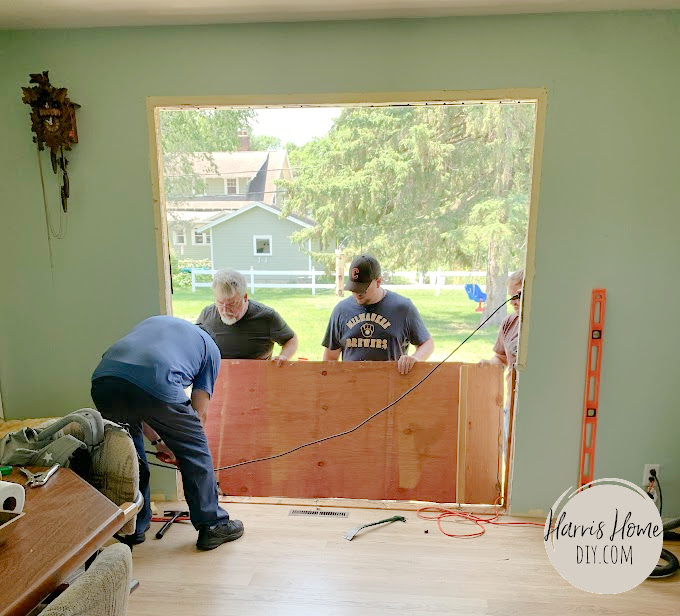
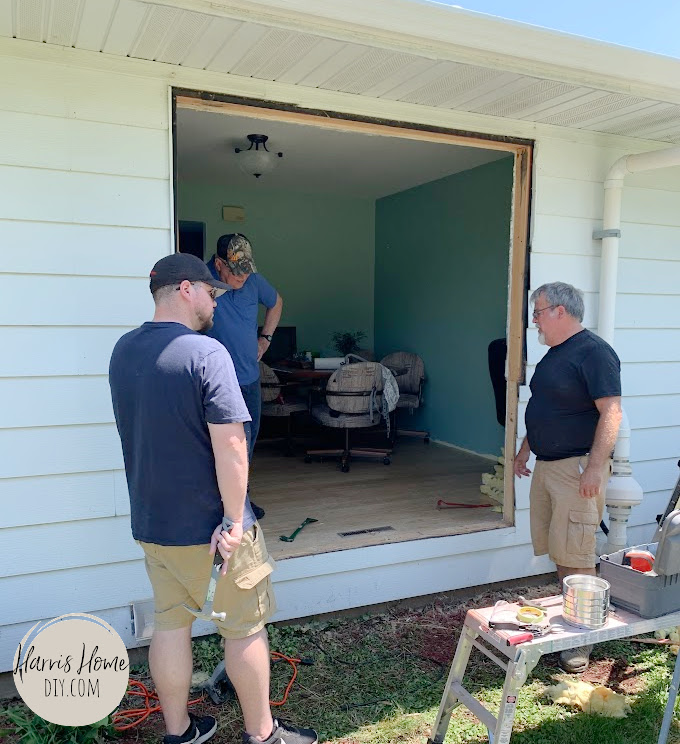
I won’t dive too deep into the details of our process because there’s a thousand and one ways to demo a hole in your house. Your journey to get there will be unique to the tools you have on hand and the details of your house. I will emphasize though, however makes sense for you to achieve the demo, make sure you don’t cut into the studs on the left and right side of the window opening. It’s key to keep the opening the same size if you are doing this as a true DIY project and not involving contractors.
Now to install the door, per brand specifications, and try it out!!
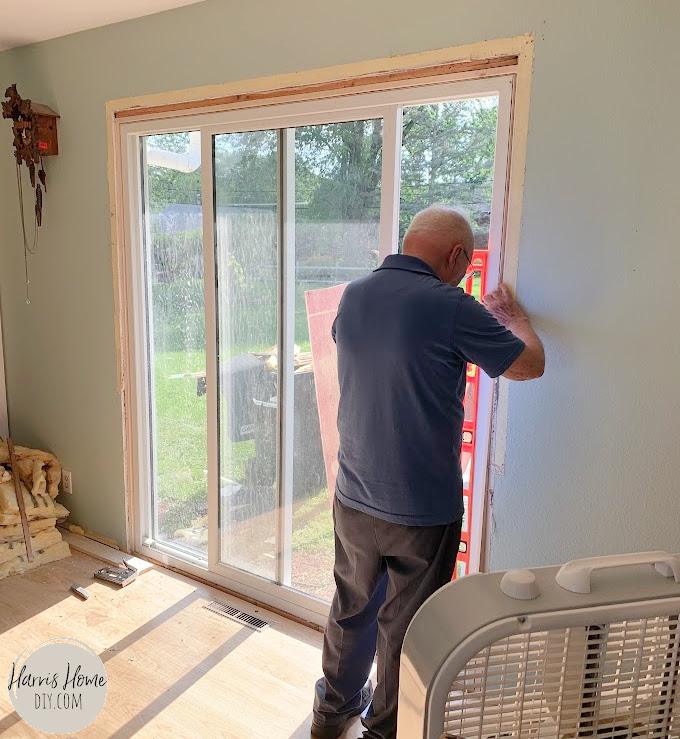
The little guy came to investigate and seems to like it too!
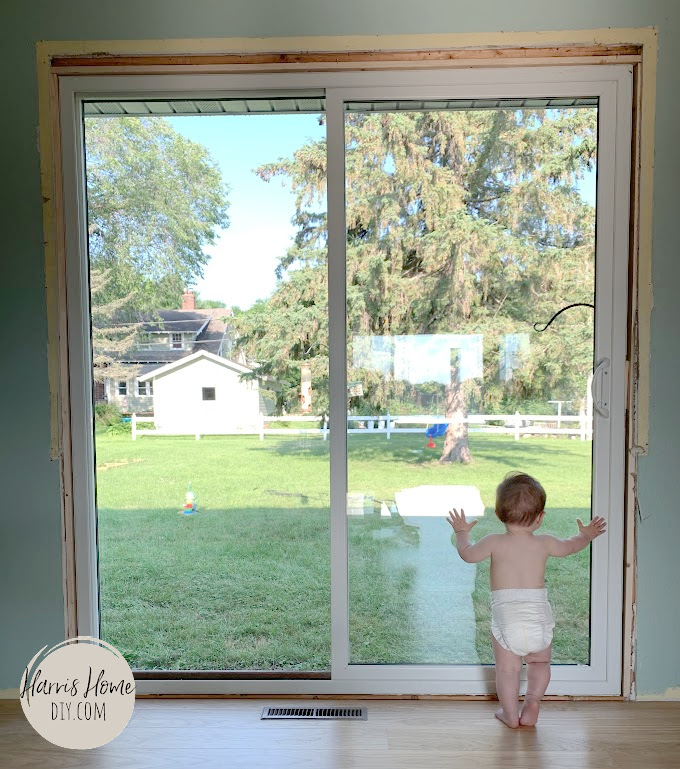
All that was left at this point was to frame it out- both on the interior and exterior. We used wood 1x3s to frame the inside and some PVC door trim to match the color of our house on the exterior. After some painting and caulking, the project was done!
Don’t mind the season change… I realized I had never snapped a photo of the final project back in the summer!
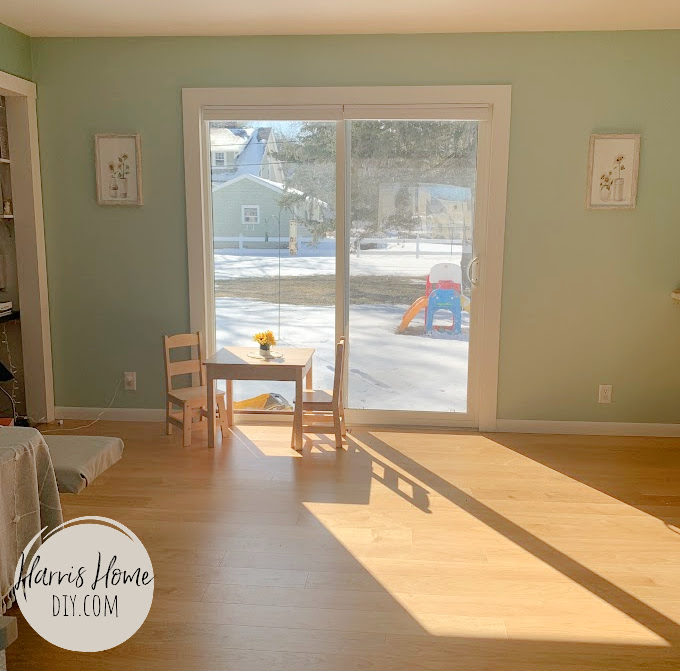
And there you have it! Our journey swapping out a window for a door.
P.S. This is our dining room (in a small 1,000 square foot house)- if you’re curious how we have a big open area instead of a centered table and chairs, take a peek at our Breakfast Nook Blog to see how we achieved this!
5. The Benefits of Having a Backyard Exit in Your House
I meant it when I said this was a game changer. When we are blessed with nice weather, there’s not a single day this door doesn’t get used. Here’s a quick list I compiled of benefits to having a backyard exit.
- Having a quick entrance/exit point for your kids to come and go from outside play
- A door, if you install a sliding glass or French style door, lets in much more light than a window
- If you host gatherings with friends or family, it allows for easy access in and out of the house to get food and socialize both indoors or outdoors
- It simplifies doing laundry if you are someone who likes to line-dry your clothes
- It makes the room the door is located in feel much larger
- I looked it up and although it doesn’t seem that adding a door adds money value to your house, it undoubtedly adds resale attraction value
- This is a great way to upgrade your backyard as well. You can add pavers in front of the door and decorate it with outdoor chairs and a table, add a firepit, a neat DIY pergola, a path of stepping stones from the door entrance to your garden… the options are endless!
In Conclusion…
I hope this blog, whether you were searching for this specific topic or stumbled across it on accident, opens the door on the possibilities of what you can do with your home to make it more functional and aesthetic (no pun intended. …ok actually, pun very much intended). I know I usually end these blogs with “If we can do it, you can too!” but since I said this wasn’t a beginner friendly project, I’ll leave you with this:
If you have the confidence, or are even 50% sure you can tackle this… you will not regret it! And remember, any problem you encounter is usually just a quick Google-search-solution away. Happy DIYing!
-Jeannie and Shawn
