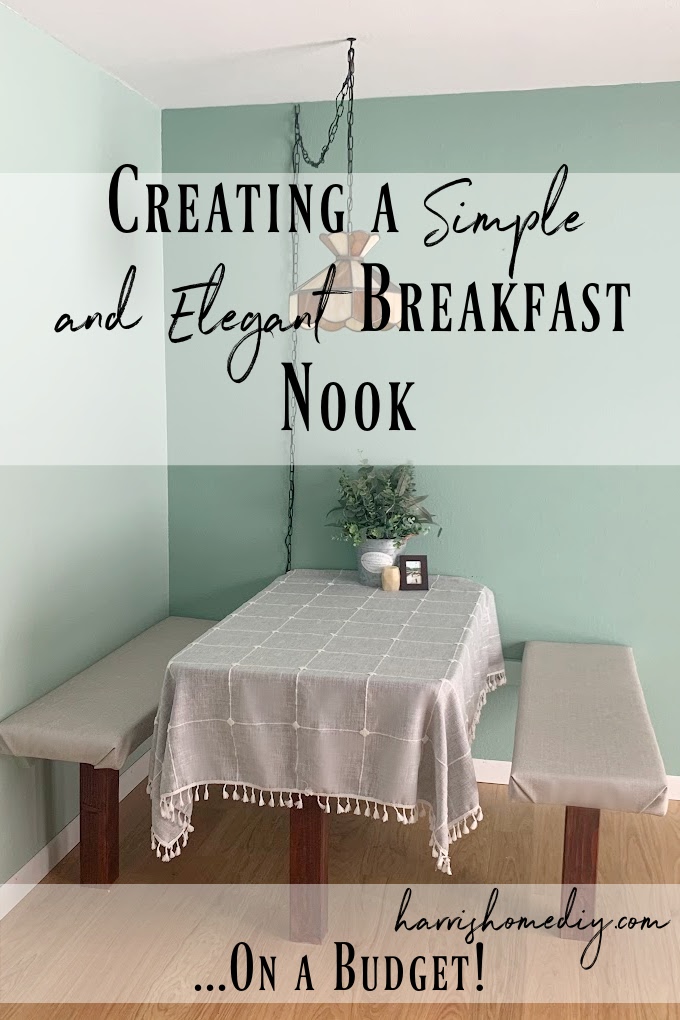
It has been one of my dreams to create booth style seating in our dining room. At 34 weeks pregnant, my nesting instincts kicked in hard and my husband and I decided to make that dream come true. We came up with a very simple and budget friendly design that can be replicated or used as inspiration for your own breakfast nook creation!!
A quick look at what’s in this blog:
- Creating your design
- Acquiring supplies
- Building the supports
- Putting it together
- Finishing touches (Jump ahead to this part for some great money saving tips and a non toxic paint stain option!!)
1. Creating Your Design
This seems like such a simple step in a DIY project, but it’s usually the most important. First, you need to establish the spot you want the breakfast nook and determine if there’s enough space to seat the number of people you want at your table comfortably. We went through many design ideas, including an L-shaped bench that wrapped around the back and one side of the table. We ultimately decided on a “restaurant” style booth seating, with two separate benches on either side of the table. One side is nestled up against the wall and one bench is left open-backed. (For reference, we wanted a seating area that would comfortable seat 4 adults.)
You can sketch your idea, draw it to scale in an online design program if you are familiar with one, or like us, piece together things you already have in the house to “get a feel for it.”
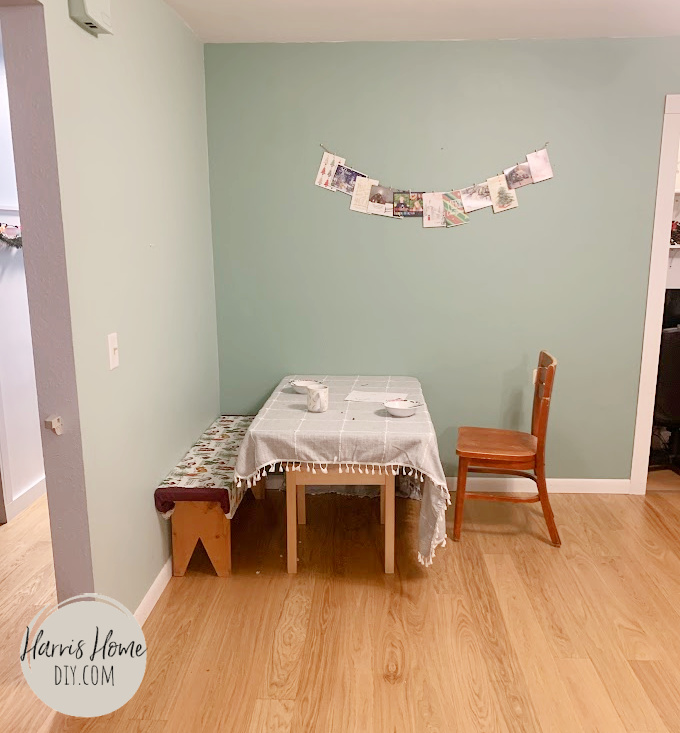
We decided we were happy with the spot, spacing, and design, and moved on to getting the building supplies we needed!
2. Acquiring Supplies
For a similar design to ours, you can absolutely get two slabs of wood from the hardware store and cut them down to size for the benches. Additionally, another piece of wood can be purchased for the table top. The cost of this project will be largely determine by the type, quality, and thickness of wood you go with for these pieces.
For our project, however, we repurposed some old materials and saved some big bucks in the process. My husband and I are a little obsessed with upcycling materials and finding things at the thrift store as often as we can. This project was definitely no exception! For the benches, we used wood from an old free church pew we got our hands on. The table top was actually the top stripped off of our old living room coffee table that wasn’t in use anymore. The cushions we used to upholster the benches with were also from the free church pews.
My suggestion, if you can’t get your hands on scrap wood and want to be super frugal with this project, is to look for benches/tables on Facebook Marketplace. You may find something for really cheap that you can strip apart (for example, if it’s a table, just remove the legs and wa-la!).
Here is a quick list of all of the supplies we used:
- Wood for the benches
- Wood for the table top
- Screws
- Small metal L-brackets
- Leg posts (4x4s)
- Wall braces (2x4s)
- Wood stain (from ECOS paints)
- Paint (leftover from painting the wall)
- Foam for the bench cushions
- Material to upholster the benches
3. Building the Supports
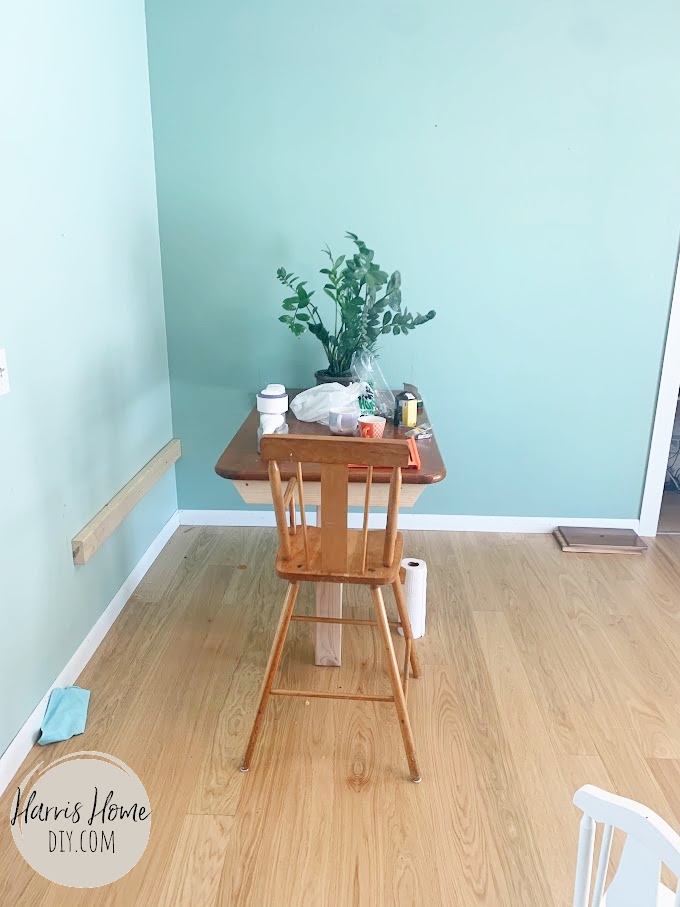
We kept the support design super simple. This ultimately helped keep the cost down and allows others, like yourself, to easily duplicate the process. For the support of both the benches and the table, we screwed 2x4s into the studs in the wall. I included a few images to demonstrate this.

Don’t worry, just off to the side of the last picture is my husband on full-child duty while my “big helper” pretends to use the drill. 🙂
We first located and marked off the studs in the wall. You absolutely want to drill these boards into studs… drilling them into just the sheet rock will not give you the support you need to sustain any amount of weight on your benches or table.
Then, we measured how far out we wanted these support boards from the corner of the wall and cut them. We wanted them to stop at the ends of the benches and not protrude beyond them.
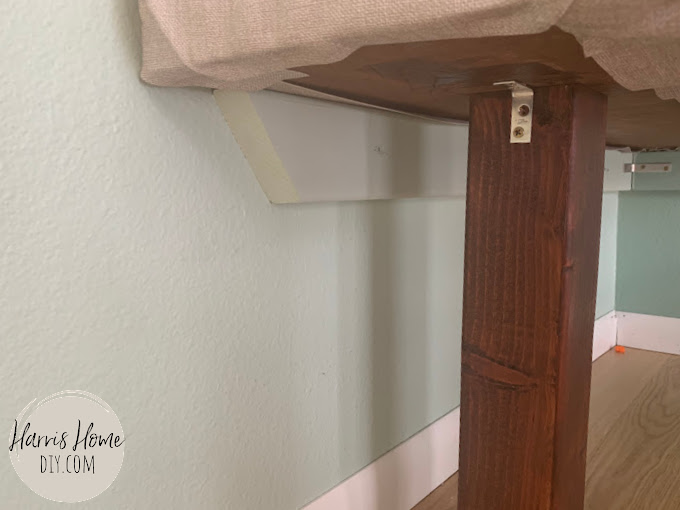
To support the outside edge of the benches and table, we wanted a clean, streamline design that looked consistent and functioned well. We went with big 4×4 wood posts, centering them on both benches and the table.
(At first we tried two legs at the outside end of the table, and let me tell you.. it was near impossible to slide into the benches comfortably without running into the table legs. Because we went with a smaller size table for our design, we are happy with the stability of the one centered wood post. You can certainly play around with this and try out a different design for your specific space and dimensions.)
4. Putting it Together
Now comes the fun part! Once you have the support wood in place, all you have left to do is cut the square posts to the corresponding heights for the benches and table and screw everything into place. You’ll want to make sure the wood posts are cut so the support is level with the height you chose for the 2x4s that are already attached to the wall.
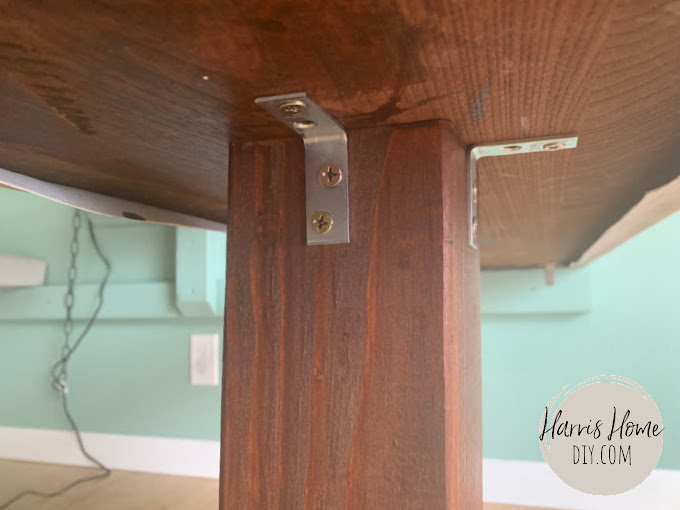
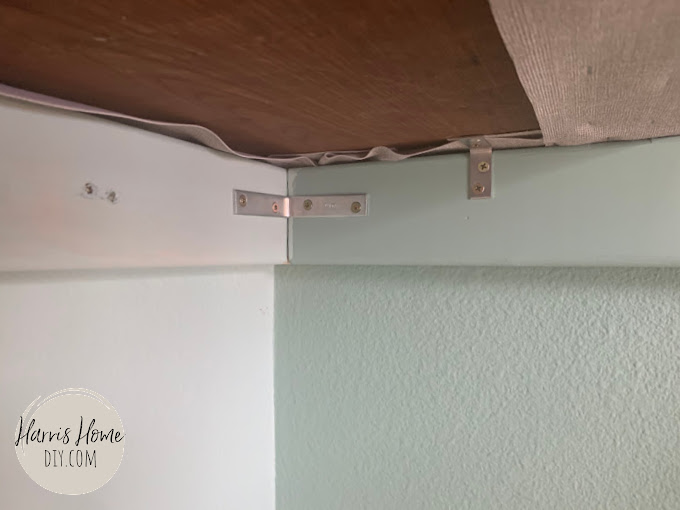
We decided to upholster our benches before attaching them. This is completely up to your style preferences if you wish to do this. I’ll have a blog coming soon on a SUPER simple, one-tool way to do this.
For reference, these were the measurements of our specific design:
- Dimensions of benches: 50″ deep X 14″ wide X 19″ high
- Dimensions of table: 50″ deep X 30″ wide X 28″ high
- Distance between the inside edge of the benches and the edge of the table: 6.5″
5. Finishing Touches!
Ok, I know I said the last section was the fun part, but this is probably the actual fun part: tying it all together visually. For the support boards, I wanted the bits you would see between the benches and table to blend into the background so I painted them the same color as the wall.
The benches I upholstered with a thick, vinyl, wipeable fabric from Joann’s (and used a 50% off coupon… I was able to get enough fabric to upholster both benches for under $25!!). I HIGHLY recommend using a durable, wipeable fabric since this is an eating area…. especially if you have little at home like myself.
The wood post supports I used wood stain on. We used ECOS wood stain and I could not have been more impressed.. First of all, here’s a little tip. They sell sample sizes (2oz.) for fairly cheap and they ship for free. As of the date I’m writing this, if you buy 3, you get a $10 coupon off your next purchase of a gallon or more of their product. (We bought 3 sample sizes of the Spiced Pecan and we only used 1 and a half for reference.)
Secondly, the website touts no-VOC and low/no odors. I have a very sensitive nose (minus the fact I’m pregnant right now and want to avoid chemicals whenever possible) and LET ME TELL YOU…. We literally COULD NOT smell it. I was actually blown away. So was my husband… and he’s not easily impressed. It stained beautifully in just a single coat. We even stained it indoors during winter and had no issues with that whatsoever.
As for the table top, I threw on my favorite table cloth and called it a day. And I have to brag about this table cloth for a second. It’s held up for years with a baby and now toddler and well, frankly, my husband says I’m pretty messy too so there’s that.
It’s neutral and goes with any season and additional decor in the room and washes SO well. I’ve had to put in some elbow grease to get a few tomato stains out, but to my surprise, every single stain has always disappeared completely once I send it through the washer. Plus it comes in multiple sizes and did I mention it’s just really cute??
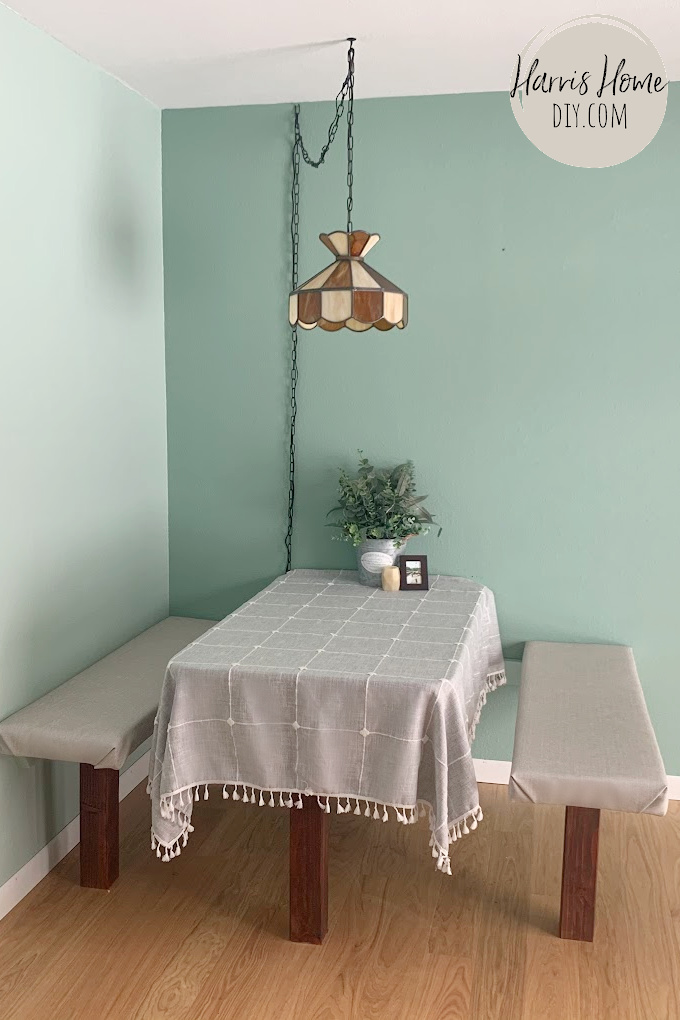
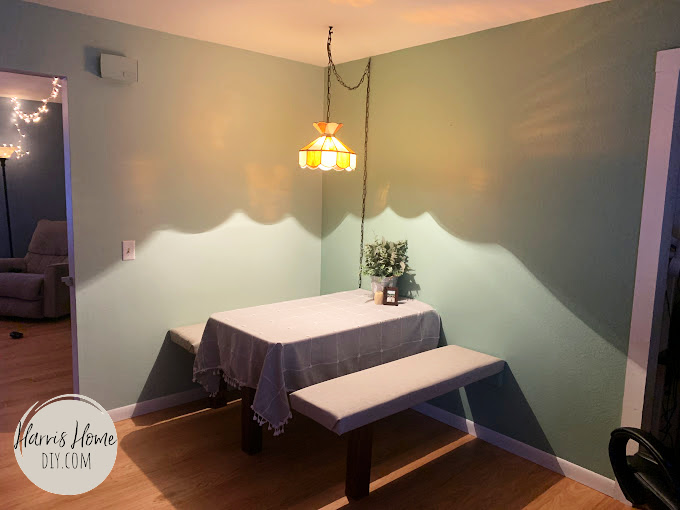
If you are in love with the hanging light like I am, I hate to tell you this.. but it was a thrift store find (for only $12!!). We stained the wood post legs dark to tie in with the amber color of the light and you guys… it came together perfectly. This next picture doesn’t do it justice but look at the ambiance in the evening time. I’m obsessed!!
In Conclusion…
You got this!! If you are creating a breakfast nook in your house right now, I just want you to know ahead of time.. you will not regret it. It turned our eating area into a closer-knit, more intentional moment of the day. We have bonded in a special way as a family in this little corner of our house. I know you will in your home as well.
I hope this blog has inspired you to be frugal and keep the design simple… and to give this project a try! Add in your own design touches and tailor it to serve your family and home perfectly.
And remember… if we can do it, you can too!
Sincerely,
Jeannie and Shawn
